Cleveland Rental Appliance Repairs: Who Pays?
Published: August 14, 2026
Appliance repairs have a habit of arriving at the worst possible moment. One tenant hands over the keys, another is scheduled to move in, and suddenly the refrigerator is warm, the dryer sounds like a cement mixer, or the oven refuses to heat past 250 degrees. For Cleveland landlords, these surprises can be especially frustrating because many rental properties contain older kitchens, basement laundry areas, aging electrical connections, and appliances that have survived several tenant turnovers. The repair itself may not be the biggest expense. Emergency labor, delayed move-ins, repeated service calls, rushed replacements, and lost rent can turn a relatively small problem into a painful bill.
The good news is that appliance costs are not completely unpredictable. A landlord who treats the turnover period as a structured maintenance opportunity can catch many failures before the next tenant begins unpacking. The goal is not to make every appliance look brand new or replace equipment simply because it has a few scratches. The goal is to identify developing problems, correct inexpensive causes, document condition, and make calm repair decisions before the clock starts working against you. Think of the turnover inspection like a physical exam for the property. You are looking for weak signals before they become emergencies.
A practical system also helps you avoid the two expensive extremes landlords often fall into. The first is repairing the same worn-out machine again and again because replacement feels too costly. The second is throwing away an appliance that only needed cleaning, leveling, a new hose, or another inexpensive part. Neither approach is financially disciplined. Cleveland landlords can reduce appliance repair costs by combining careful inspections, preventive cleaning, standardized equipment, reliable documentation, sensible replacement rules, and clearer tenant education. When those pieces work together, appliance spending becomes less like a series of random fires and more like a manageable operating expense.
The period between tenants gives you something that is difficult to obtain during an occupied lease: access, control, and time to test equipment without disrupting someone’s daily life. During a tenancy, even a simple diagnostic visit can involve coordinating schedules, arranging entry, moving personal belongings, and dealing with a resident who understandably wants the problem fixed immediately. Between tenants, you can run a full dishwasher cycle, pull the refrigerator away from the wall, inspect dryer ductwork, test every oven setting, and leave equipment unplugged while a part is being replaced. That flexibility can reduce labor charges and prevent rushed decisions.
Turnover is also the moment when small warning signs are easiest to notice. A tenant may have lived with a refrigerator door that needed an extra push, a washer that vibrated during the spin cycle, or a burner that heated unevenly. Those annoyances may never have been reported because the appliance technically still worked. Once the unit is empty, you can test it under controlled conditions and decide whether the issue needs adjustment, repair, or monitoring. Catching a loose door seal today is cheaper than responding to spoiled food and a completely failed refrigerator next month.
This window is valuable for another reason: you can group work. A technician who checks multiple appliances during one scheduled visit may cost less than several separate emergency calls. Your maintenance worker can clean coils, replace hoses, level machines, inspect cords, and photograph model information in a single pass through the unit. Grouping tasks also helps you coordinate appliance work with painting, flooring, pest control, and general cleaning.
The mistake is treating turnover as a cosmetic sprint focused only on walls, floors, and visible damage. Appliances are part of the property’s operating system, even when they are not the first thing prospective tenants notice. Give them a dedicated place in your turnover schedule, preferably early enough that parts can be ordered and repairs can be completed before the next lease begins.
For rental properties in the city, landlords can also plan ahead for appliance repair in Cleveland, OH when an inspection identifies a problem that requires professional diagnosis.
A reliable turnover inspection should not depend on memory. Even an experienced landlord can forget to test the broiler, inspect the refrigerator seal, check the dryer vent, or look beneath the dishwasher when several units are turning over at once. A written checklist creates consistency, especially when maintenance employees, property managers, or contractors handle inspections on your behalf. The checklist does not need to be complicated. It simply needs to cover the same operating, safety, cleanliness, and condition points every time.
Begin by recording the appliance type, approximate age, model information, visible condition, and whether it is supplied as part of the lease. Take a wide photo showing the entire appliance and several close-up photos of controls, doors, interior surfaces, cords, hoses, and existing cosmetic damage. Then operate the appliance rather than merely turning it on for a few seconds. A refrigerator needs enough time to cool. A washer needs to fill, agitate, drain, and spin. A dishwasher needs to complete a cycle so you can check for standing water and slow leaks. An oven should be tested at a normal cooking temperature, not just confirmed to have a glowing display.
Use your senses. Listen for grinding, squealing, rattling, repeated clicking, or motors that cycle more frequently than expected. Look for water stains, warped flooring, cracked hoses, scorched outlets, damaged knobs, grease buildup, rust, and loose doors. Smell for overheating electrical components, mildew, gas-like odors, or stagnant water. Never ignore a burning smell or damaged connection simply because the appliance appears to operate.
End the inspection by assigning each appliance a clear status: ready, clean and retest, minor repair, professional diagnosis, or replacement candidate. This prevents vague notes such as “washer seems okay,” which are not useful two weeks later. A consistent status system also lets you compare appliance performance across properties and identify which models, configurations, or installation conditions create recurring expenses.
Refrigerators deserve special attention because they run continuously and can create expensive tenant complaints when they fail. A unit may appear cold during a quick walkthrough even though it struggles to maintain temperature, cycles constantly, leaks intermittently, or has a door that does not seal properly. Begin the inspection by checking cleanliness and airflow. Dust, pet hair, and debris around accessible coils or ventilation areas can force the system to work harder. Cleaning those areas may improve performance and extend the appliance’s useful life without replacing a single mechanical component.
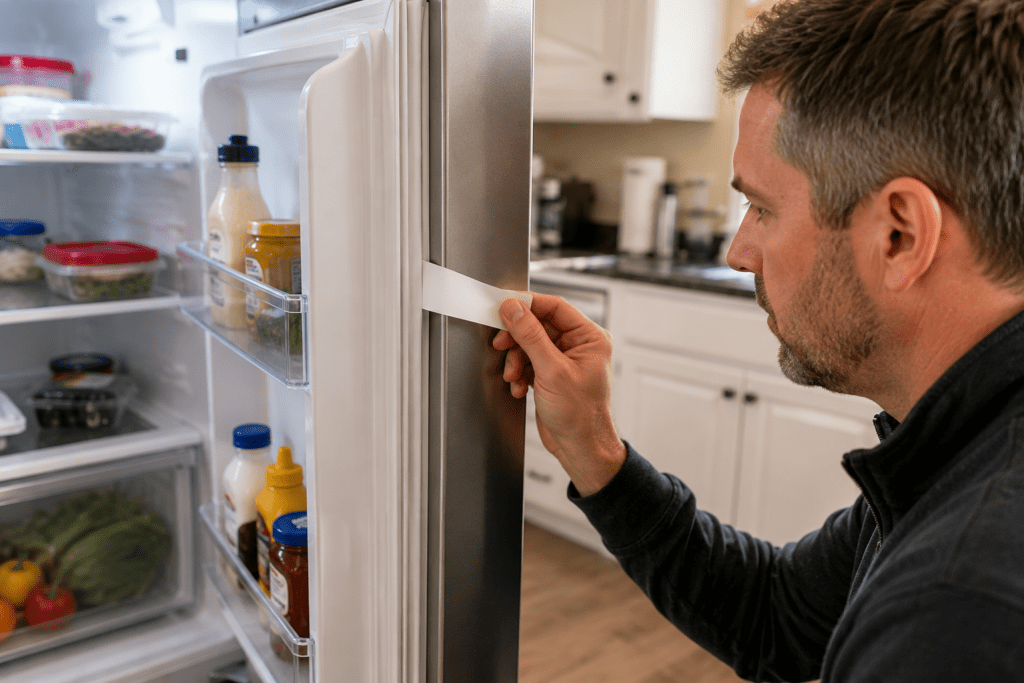
Inspect the door gasket carefully. Close the door on a strip of paper at several points around the edge. If the paper slides out with almost no resistance, the seal may be dirty, loose, warped, or damaged. Before ordering a replacement, clean the gasket and the surface it contacts, then retest it. Also check whether the appliance is level. A refrigerator that tilts forward may not close firmly, while one placed against an uneven floor can develop vibration or drainage problems. Small leveling adjustments can prevent repeated complaints about doors being left slightly open.
Look beneath and behind the refrigerator for water marks, damaged supply lines, loose connections, pest activity, and flooring deterioration. When an ice maker or water dispenser is present, inspect the line rather than assuming it is safe because no active leak is visible. Slow leaks often leave mineral deposits or discolored flooring before they create a noticeable puddle. Confirm that interior lights, shelves, drawers, and temperature controls work as intended. Missing shelves can encourage overpacking, which blocks airflow and leads tenants to lower the temperature unnecessarily.
Allow the refrigerator to stabilize after cleaning or moving it. Use a basic appliance thermometer instead of judging temperature by touch. If cooling remains inconsistent, document the symptoms, including how often the compressor runs, whether frost appears, and which sections are warmer. Detailed notes can make professional refrigerator repair more efficient by giving the technician clearer information about the symptoms before diagnosis.
Cooking appliances can pass a visual inspection while hiding problems that become obvious during the first week of a new tenancy. A glowing clock does not prove the oven heats correctly, and a burner that turns on does not prove it responds to temperature changes. Start by inspecting knobs, control markings, door hinges, racks, seals, burner surfaces, and the area beneath removable components. Heavy grease can cause smoke, odors, uneven heating, and false reports of mechanical failure. Clean the appliance thoroughly before deciding that a component is defective.
Test every burner or heating area individually. Confirm that it activates, reaches operating temperature, and responds when the setting is reduced. Watch for delayed ignition, repeated clicking, unusual flame patterns, sparking, damaged elements, or controls that feel loose. When working around a fuel-burning appliance, treat unusual odors, ignition problems, or damaged connections as safety concerns rather than routine maintenance. Shut the appliance down and use a qualified professional when the source of the problem is uncertain.
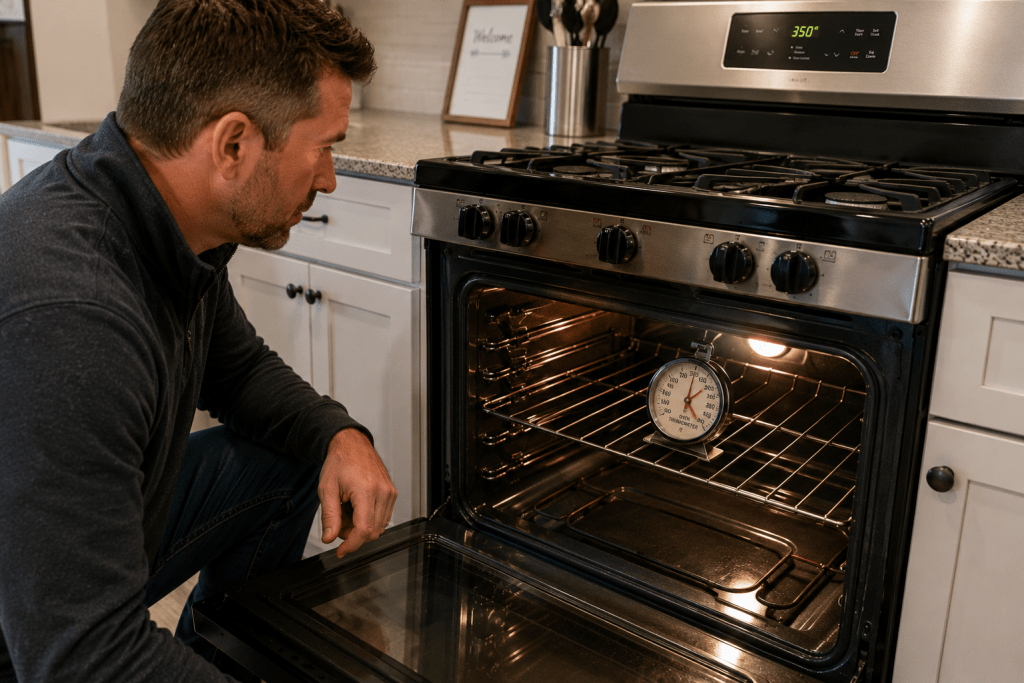
The oven should be tested at a common baking temperature and allowed enough time to preheat fully. An inexpensive oven thermometer can reveal whether the displayed temperature is reasonably close to the actual temperature. Some variation during a heating cycle is normal, but a major or persistent difference may point to a sensor, control, element, calibration, or airflow issue. Test the bake and broil functions separately because one can work while the other fails. Check that the oven light, timer, fan, and door latch operate when those features are present. If the oven continues to heat incorrectly after these basic checks, professional oven repair can help determine the cause rather than relying on guesswork.
Pay attention to installation conditions. An appliance pressed tightly against a wall, sitting unevenly, or connected to a damaged outlet may develop problems unrelated to the machine itself. Confirm that anti-tip protection is installed where required and that the unit sits securely. Good testing protects more than your repair budget. It reduces the risk of sending a new tenant into a unit with a cooking appliance that is unreliable, unsafe, or likely to trigger an urgent maintenance request.
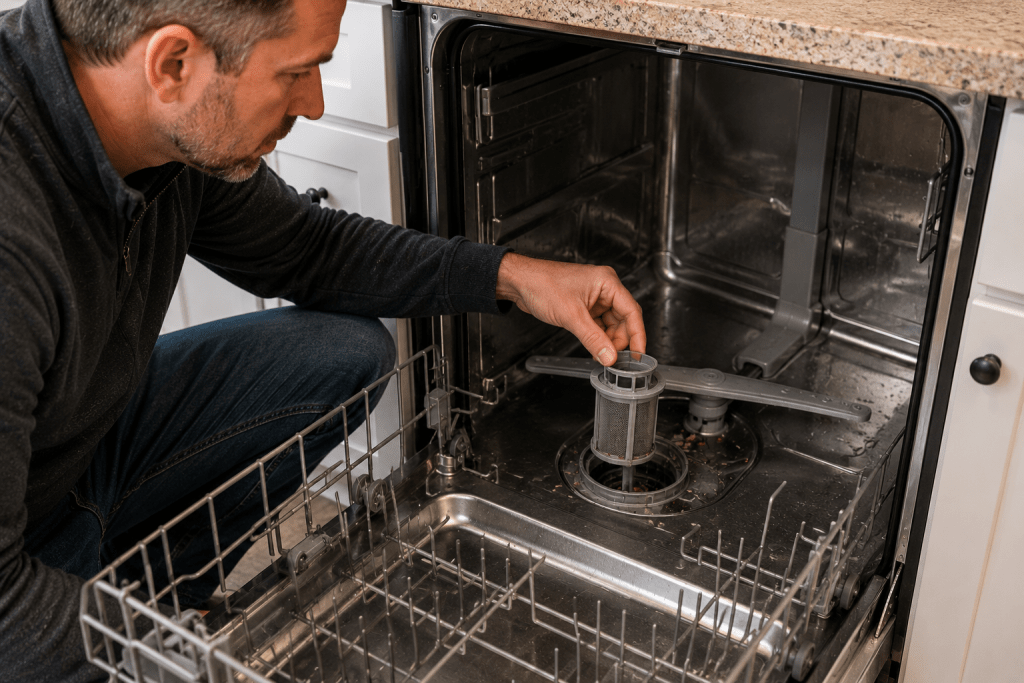
Dishwashers often fail quietly. A small leak may remain hidden beneath the unit, while poor drainage can leave only a little water at the bottom after each cycle. Over time, that moisture can damage cabinets, flooring, and nearby walls, making the appliance repair look cheap compared with the surrounding property damage. During turnover, inspect the floor and cabinet areas around the dishwasher before running it. Look for swelling, discoloration, peeling surfaces, soft materials, mineral deposits, and musty odors. These clues may reveal a previous leak that is not active at the exact moment of inspection.
Remove and clean accessible filters, screens, and spray components according to the appliance’s design. Food debris, labels, glass fragments, grease, and mineral buildup can restrict drainage or prevent water from circulating properly. Many “dishwasher is not cleaning” complaints begin with poor loading or a neglected filter rather than a failed pump. Check that spray arms move freely and that their openings are not blocked. Inspect racks, wheels, detergent areas, door seals, hinges, and latches for damage.
Run a complete cycle with the machine empty after cleaning it. Do not walk away immediately. Observe the fill stage, listen during washing, and inspect beneath the front edge and nearby cabinets for moisture. Check again during draining and after the cycle ends. The appliance should drain without leaving excessive standing water, and the door should remain securely closed. Listen for grinding, humming without water movement, repeated stopping, or unusually loud operation. If drainage, leaking, or abnormal operation continues after the basic checks, schedule professional dishwasher repair to diagnose the problem before the next tenant moves in.
Also inspect the drain hose and the way it is routed. Poor hose positioning can allow dirty water to return to the machine or contribute to drainage problems. Confirm that connections are secure and that no hose is brittle, flattened, or rubbing against a sharp edge. A low-cost hose or clamp replaced during turnover can prevent a damaging leak during occupancy. When you find evidence of past water intrusion, photograph it and investigate the surrounding materials before installing or repairing the appliance.
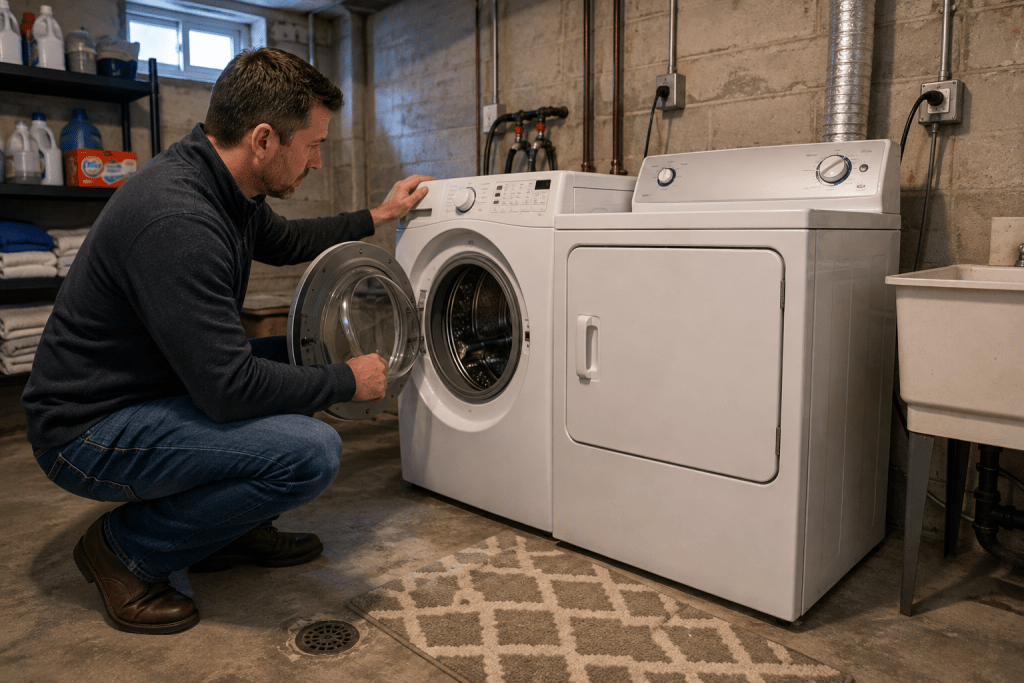
Laundry appliances take a beating because tenants load them differently, use varying amounts of detergent, wash bulky items, and sometimes ignore early warning signs. A washer may complete a light test cycle but struggle with a normal load, while a dryer may heat yet take far too long because airflow is restricted. A useful turnover inspection needs to reproduce ordinary use closely enough to expose obvious problems. For a washer, inspect the drum, dispensers, door or lid, gasket, supply hoses, drain hose, floor, valves, and electrical connection before starting the machine.
Run a cycle and observe every stage. The washer should fill properly, agitate or tumble, drain, and spin without violent movement, repeated stopping, leaking, or loud mechanical noise. Excessive shaking does not always mean the machine is failing. It may be unlevel, sitting on a weak floor, or carrying an unbalanced test load. Check the feet, floor stability, and clearance around the machine before paying for a repair. Inspect rubber hoses for cracking, bulging, stiffness, or corrosion near the fittings. Replacing a questionable hose is usually far less expensive than repairing water damage. When abnormal noise, leaking, draining, or spinning problems remain after installation and load issues have been ruled out, washer repair may be the appropriate next step.
For the dryer, clean the lint area and inspect the duct path from the appliance to the exterior termination. Restricted airflow causes long drying times, overheating, extra wear, and avoidable service calls. Confirm that the exterior vent opens freely and is not blocked by lint, debris, or a damaged cover. Run the dryer long enough to test heat, drum movement, controls, noise, and airflow. A dryer that produces heat but moves little air still has a serious performance problem. If the dryer continues to take too long to dry after the airflow path has been checked, see why your dryer takes too long to dry clothes for other possible causes and signs that further diagnosis may be needed.
Do not ignore placement. Basement laundry areas in Cleveland homes may have uneven floors, moisture, dust, long duct runs, and tight clearances. Those environmental conditions affect appliance life. Correcting ventilation, leveling, drainage, and installation issues can deliver more savings than repeatedly repairing machines that are operating in a poor setup.
Cleaning is not merely about presentation. It is one of the cheapest diagnostic tools a landlord has. Grease can make a range smoke, lint can make a dryer overheat, food debris can prevent a dishwasher from draining, and dust can make a refrigerator run longer than necessary. When you diagnose a dirty appliance, you may mistake a maintenance problem for a mechanical failure. Cleaning first removes that confusion and gives you a clearer picture of the equipment’s actual condition.
Use the right level of cleaning for the appliance rather than attacking every surface with the strongest product available. Harsh chemicals, excessive water, abrasive pads, and careless scraping can damage finishes, markings, seals, controls, and electrical areas. Focus on airflow paths, filters, seals, contact surfaces, dispensers, removable trays, vents, and areas where residue interferes with operation. Protect electrical components and follow the appliance’s basic safety requirements. Disconnect power when appropriate, and do not disassemble fuel, refrigerant, or high-voltage systems unless the work is being handled by someone qualified.
After cleaning, retest the appliance under normal operating conditions. This step matters because cleaning may solve the problem completely or change the symptoms. A dishwasher that drained poorly may work normally once the filter and hose area are cleared. A refrigerator door may seal correctly once sticky residue is removed. A dryer may recover its airflow after lint is removed from the duct. When the issue remains, you now have better information to share with a technician.
Cleaning also helps you judge whether an appliance is worth keeping. A machine covered in grime can look ten years older than it is, while a thoroughly cleaned unit with sound controls, intact surfaces, and reliable operation may have plenty of useful life left. On the other hand, cleaning may expose cracked seals, rust, scorched areas, or hidden damage that supports replacement. The rule is simple: do not make a major spending decision while dirt is still hiding the evidence.
Every appliance ages, even when tenants use it responsibly. Door seals flatten, finishes fade, racks develop surface rust, switches wear, and moving parts eventually loosen. Those conditions are different from broken shelves caused by overloading, melted components, missing parts, impact damage, unauthorized alterations, or foreign objects lodged in a pump. Separating normal wear from tenant-caused damage matters because it affects documentation, security-deposit decisions, insurance records, and the way you plan future maintenance. It also helps you avoid unfairly charging a resident for a failure that was already developing.
Start with the appliance’s move-in condition. Without dated photos and written notes, it can be difficult to prove that a crack, dent, missing rack, or damaged control appeared during a particular tenancy. A vague statement such as “appliances in good condition” does not show whether a refrigerator shelf already had a hairline crack or whether the dryer door was slightly bent. Detailed documentation protects both parties because it creates a shared baseline.
Next, consider the failure pattern. A worn bearing, aging heating component, or control failure may occur after years of ordinary use. A drain pump jammed with coins, screws, or another foreign object may suggest misuse, although the surrounding facts still matter. A shattered glass surface may look tenant-caused, but installation stress or a preexisting chip could also contribute. Avoid making assumptions based only on the repair price or the frustration of discovering the problem during turnover.
When damage may be chargeable, obtain clear photographs, technician notes, invoices, and evidence of the item’s prior condition. Account for age and remaining useful life rather than treating an older appliance as though it were new. Cleveland landlords should also make sure any deduction or charge aligns with the lease and current legal requirements. A fair, well-documented process is easier to defend and preserves a professional relationship with former tenants. It also keeps your maintenance accounting accurate by preventing ordinary equipment depreciation from being mislabeled as tenant damage.
The most expensive appliance decision is often the emotional one. A landlord who is tired of repeated complaints may replace a machine that had a simple installation problem. Another landlord may keep authorizing repairs because replacing the appliance feels like admitting defeat. A better approach compares cost, age, condition, reliability, parts availability, energy use, tenant expectations, and the risk of another failure. The cheapest option today is not always the least expensive option over the next two years.
Repair is usually attractive when the problem is clearly identified, the total cost is modest, the appliance is otherwise sound, and the repair is likely to restore dependable operation. Rebuilding or performing a larger repair may make sense for a durable unit with a good cabinet, accessible parts, and a known maintenance history. Replacement becomes more appealing when the appliance has several worn systems, severe corrosion, unavailable parts, repeated failures, safety concerns, or a repair cost that approaches a meaningful portion of replacement cost. For a more detailed framework, see our guide on whether to repair or replace an appliance.
| Decision | Best Fit | Warning Sign |
|---|---|---|
| Repair | Newer or midlife appliance with one clear failure | Diagnosis is uncertain or several parts are worn |
| Larger rebuild | Solid appliance with proven reliability and available parts | Labor cost grows while other systems remain weak |
| Replace | Old, unreliable, unsafe, badly damaged, or repeatedly repaired unit | Replacement is rushed without checking installation causes |
Consider turnover timing as part of the calculation. A repair that saves money but delays move-in may not be economical once lost rent is included. At the same time, an emergency replacement purchased without measuring the space, checking connections, or reviewing delivery requirements can create additional costs. Use a written decision process and document why you chose the option. Over time, those records will show whether your repair thresholds are working or whether certain appliances continue consuming money after they should have been retired.
A practical age-and-cost rule helps landlords make consistent decisions when the repair estimate arrives. One common starting point is to compare the total repair cost with the price of a suitable replacement, then adjust for the appliance’s age and condition. The word “total” matters. Include diagnostic fees, labor, parts, delivery, removal, installation adjustments, and the possibility of another service visit. A repair that appears inexpensive on the first invoice can become costly when the technician must return or when another worn component fails soon afterward.
Many property owners become cautious when a repair approaches roughly half the cost of replacement, but that threshold should not be treated as a rigid law. A high-quality, well-maintained appliance with a known history may justify a substantial repair. A neglected or unreliable machine may not be worth fixing even when the initial estimate is lower. Age changes the calculation because an older appliance has less time to spread the repair cost across future months of service. Condition matters just as much. Rust, damaged wiring, cracked interiors, worn hinges, failing seals, and repeated noise may indicate that the quoted repair addresses only one part of a larger decline.
Create a simple scoring sheet for your rentals. Record age, previous repair spending, current estimate, replacement cost, expected downtime, parts availability, physical condition, and safety concerns. Assign extra weight to repeated failures. A refrigerator that has needed three service visits in eighteen months is telling you something, even if each individual repair seemed reasonable.
Also consider how easily the replacement can be installed. A slightly less expensive appliance may require electrical, plumbing, cabinetry, or ventilation changes that erase the savings. The purpose of the rule is not to produce a perfect mathematical answer. It is to stop urgency, frustration, or attachment from controlling the decision. A consistent framework turns replacement from a stressful guess into a repeatable business choice.
Standardization can quietly reduce repair costs across an entire rental portfolio. When every unit contains a completely different appliance configuration, your maintenance process becomes a scavenger hunt. Technicians need more diagnostic time, you must track more part numbers, replacement dimensions vary, tenant instructions differ, and leftover components from one property may be useless at another. Standardizing appliance types, sizes, colors, connections, and key features simplifies nearly every step of turnover maintenance.
You do not need every machine to be identical. The goal is to create a narrow set of approved specifications. For example, you might choose one common refrigerator width for most kitchens, one range configuration, one standard dishwasher opening, and a limited number of laundry setups. Keep features straightforward unless your rental market clearly rewards premium options. Complex controls, specialty dispensers, connected features, and unusual finishes can add failure points without producing enough additional rent to justify them.
Standardization also improves your buying decisions. When an appliance needs replacement, you already know the required dimensions, utility connections, door clearance, and installation conditions. You can maintain a property file with measurements and photos instead of sending someone to measure the space again. If several units use compatible shelves, knobs, hoses, racks, or other low-cost parts, you can keep a small supply without filling a storage room with items that may never be used.
Training becomes easier as well. Your maintenance team learns the common symptoms, cleaning methods, access points, and installation quirks of a smaller equipment family. Repair technicians may diagnose issues faster because they have seen the configuration before. Tenants receive clearer operating instructions because the guidance can be reused across properties.
Standardization should still leave room for the building. A compact apartment, single-family home, and duplex basement may require different solutions. Build two or three approved appliance packages rather than forcing one setup into every space. The result is consistency without creating installation problems.
Not every part deserves a place on your maintenance shelf, but a small, organized inventory of low-cost items can prevent delays and unnecessary service calls. The best stock parts are inexpensive, easy to identify, safe for qualified maintenance personnel to install, and commonly damaged or lost during normal use. Examples may include approved hoses, clamps, leveling feet, basic knobs, refrigerator shelf supports, light covers, lint-screen components, dishwasher rack wheels, and other non-specialized items used across your standardized equipment.
The key is compatibility. A drawer full of random parts from discarded appliances is not an inventory system. Label each item with its application, part information, purchase date, and quantity. Store small components in clear bins and keep hoses or seals away from heat, sunlight, moisture, and chemicals that could shorten their useful life. Use a simple spreadsheet or property-management record to track what is on hand. When an item is used, reduce the count immediately so the shelf does not appear stocked when it is actually empty.
Do not stock expensive electronic controls, motors, compressors, or specialized assemblies unless your repair volume clearly supports it. Those parts can become obsolete, may require professional diagnosis, and can tie up cash. There is also a danger in replacing parts by guesswork. A similar symptom can have several causes, and installing an unnecessary component wastes money while leaving the real problem unresolved. Your inventory should support confirmed repairs, not encourage trial-and-error work.
Salvaging parts from retired appliances can make sense when the components are clean, undamaged, legally reusable, and compatible with active equipment. Test and label salvaged items rather than tossing them into an unmarked box. Never reuse questionable electrical, fuel, water, or safety-related components simply to save a few dollars.
A disciplined parts shelf shortens turnover timelines because your team can solve minor issues during the first visit. It also helps technicians work efficiently when a common component is already available. The savings come from preparation, not from collecting every part that might someday be useful.
A dependable repair technician can save a Cleveland landlord far more than the difference between two hourly rates. The real value comes from accurate diagnosis, honest repair-versus-replacement advice, reliable scheduling, clear documentation, and familiarity with your properties. When a technician understands your appliance standards, access procedures, payment process, and expectations, service calls become faster and less chaotic. That relationship is built through consistency rather than by searching for the cheapest available person every time something breaks.
Make the technician’s job easier. Before scheduling a visit, provide the property address, appliance type, model information, age if known, detailed symptoms, photos, error messages, and a summary of what has already been checked. Explain whether the unit is vacant and how access will be provided. A report that says “dryer broken” forces the technician to begin with almost no useful information. A report that says “drum turns, heat is present, exterior airflow is weak, duct was partially cleaned, and the machine takes two cycles to dry towels” creates a productive starting point. If the symptoms point to a problem that requires professional diagnosis, scheduling dryer repair with this information already documented can make the service visit more focused.
Ask for itemized invoices and written notes. You want to know what failed, what caused it, what was replaced, whether other components show wear, and how long the repair is expected to remain economical. These records help with future decisions and allow another technician to understand the appliance’s history. Pay invoices according to the agreed terms. Reliable clients often receive better scheduling cooperation than landlords who create paperwork problems or dispute every reasonable charge.
It can also be useful to establish service expectations in advance. Discuss diagnostic fees, approval limits, emergency rates, parts markups, warranty terms, and whether the technician will contact you before exceeding a set amount. Avoid pressuring a professional to make an unsafe temporary repair just to reach move-in day. A strong relationship works both ways: you provide organized access and prompt decisions, while the technician provides competent work and honest communication. That partnership turns repairs into planned operations rather than repeated emergencies.
Many appliance problems begin with unclear expectations rather than deliberate misuse. A tenant may not know that excess detergent can cause washer problems, that dryer lint must be removed after each load, or that certain items should never go into a dishwasher. Someone moving from a property without a garbage disposal, ice maker, or in-unit laundry may be unfamiliar with the equipment. Handing over a thick manual and assuming it will be read is not an effective onboarding strategy.
During move-in, give the tenant a short appliance orientation. Show how doors and latches close, where filters or lint screens are located, what normal operating sounds are like, and how to report a problem. Explain that overloading washers and dryers can cause vibration, poor performance, and mechanical stress. Demonstrate the correct amount and type of laundry product for the machine. Point out that refrigerator vents should not be blocked by tightly packed food and that heavy items should not be forced into door shelves. Keep the instructions practical and focused on behaviors that prevent real damage. For additional preventive guidance on laundry equipment, landlords can share practical tips on how to extend the life of a washing machine with tenants.
Reporting rules are just as important. Tenants should know that a small leak, burning smell, repeated tripped circuit, unusual sound, or failure to drain needs prompt attention. People sometimes delay reporting because they fear being charged or assume the issue will disappear. Make it clear that early reporting usually protects the property and may reduce the repair. Provide one simple maintenance contact method and request photos or video when appropriate.
Use a one-page guide for each appliance category instead of a long technical document. Include what the tenant should do, what they should avoid, and which symptoms require an immediate report. Avoid asking residents to perform repairs, move heavy machines, open electrical panels, or handle fuel connections.
Good onboarding is not about lecturing tenants. It is like handing someone the controls to a car: a few minutes of clear instruction can prevent months of unnecessary wear, confusion, and preventable service calls.
Strong documentation turns appliance management from a debate into a record. At move-in, photograph each appliance from several angles, including the exterior, interior, controls, shelves, racks, doors, hoses, cords where accessible, and any existing dents, stains, cracks, or missing pieces. Record the model and serial information when it can be accessed safely. Include the photos in a dated inspection file and connect them to the lease or condition report. A wide photo proves which appliance was present, while close-ups show its actual condition.
Video can add useful context. A short clip of the washer filling and spinning, the oven heating, the refrigerator running, or the dishwasher completing a cycle demonstrates operation at a specific point in time. You do not need to create a full documentary. Focus on conditions that might later be disputed or equipment with previous repairs. Keep the original files rather than relying on compressed images sent through text messages.
At move-out, repeat the same sequence. Compare condition, not just appearance. A clean appliance can still be damaged, while a dirty appliance may work perfectly after routine cleaning. Document missing shelves, cracked bins, broken controls, damaged seals, dents, leaks, unusual sounds, and error messages before repairs begin. Take photographs of foreign objects removed from pumps or vents and request technician notes when the cause may affect a tenant charge.
Organization matters. Files labeled “kitchen photos” are difficult to use months later. Name records by property, unit, appliance, and date. Store invoices and repair history with the same appliance record. This creates a timeline showing when the machine was installed, what failed, what was repaired, and how its condition changed across tenancies.
Documentation also improves internal accountability. If the same hose, rack, or seal repeatedly appears damaged, you can investigate installation, cleaning practices, or tenant instructions. Good records are not merely defensive evidence. They are operating data, and that data helps you spend money where it prevents the next problem.
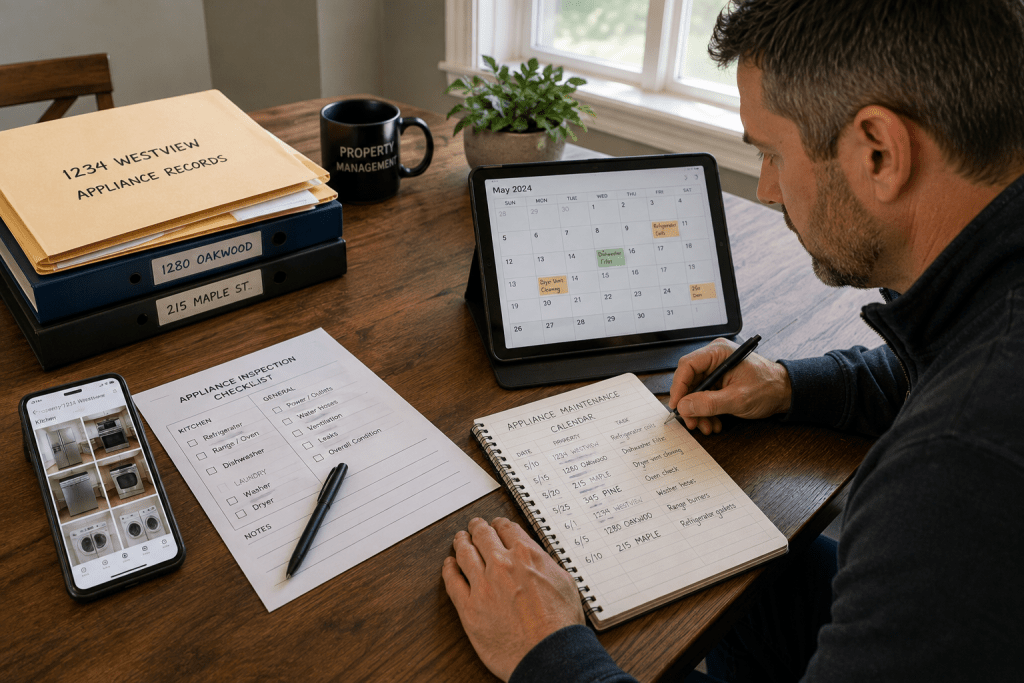
Appliance maintenance becomes expensive when it occurs only after something stops working. A preventive calendar spreads small tasks across the year and ensures that recurring responsibilities do not disappear during busy leasing seasons. The calendar should reflect your property types, appliance inventory, lease schedule, and Cleveland’s seasonal conditions. A basement laundry room with a long dryer duct may need more frequent airflow checks than a compact unit with a short direct vent. A refrigerator used by a large household may collect dust and experience heavier door wear than one in a small apartment.
Start with turnover tasks, because that is when access is easiest. Clean accessible refrigerator ventilation areas, inspect seals, test temperatures, run dishwasher cycles, inspect laundry hoses, clean dryer airflow paths, check appliance leveling, and photograph condition. Then add occupied-unit maintenance that can be completed during scheduled property inspections or coordinated service visits. Avoid unnecessary entry, but do not allow critical water, ventilation, or safety-related components to go unchecked for years.
The calendar should identify who performs each task and how completion is documented. “Check dryer” is too vague. “Inspect lint screen, visible duct connection, exterior vent operation, drying performance, and abnormal heat” produces a useful result. Include a place for findings, photos, corrective action, and the next review date. When a recurring problem appears, shorten the interval or correct the installation condition causing it.
Seasonal planning can improve scheduling. Turnover volume may rise during certain months, so order common supplies and reserve technician availability before the busiest period. Cold weather can complicate deliveries, exterior vent inspections, and access to vacant properties. Build some flexibility into replacement timelines rather than assuming every appliance can be sourced and installed immediately.
A preventive calendar does not guarantee that machines will never fail. Appliances contain parts that eventually wear out. The purpose is to catch predictable problems early, protect surrounding property, and avoid paying emergency prices for issues that could have been handled during a planned visit.
Appliance spending feels unpredictable when every repair is treated as an isolated emergency. It becomes easier to manage when you track costs by property, appliance, and year. Begin with a basic inventory showing the appliance type, installation date or estimated age, condition, repair history, and expected replacement range. Even when the exact age is unknown, a reasonable estimate is more useful than leaving the field blank. Update the record whenever a repair, replacement, or major cleaning occurs.
Create an annual appliance reserve for each property. The amount does not need to match the exact spending in a particular year. One year may bring no major failures, while the next includes a refrigerator and laundry replacement. The reserve smooths those expenses and prevents a predictable capital cost from becoming a cash-flow crisis. Properties with older kitchens, more supplied appliances, larger households, or difficult installation conditions may need a higher allowance.
Track the full cost of ownership, not just purchase prices. Include repairs, diagnostic visits, delivery, removal, installation, utility modifications, lost rent caused by delays, and maintenance time. A low-cost appliance that requires repeated service may be more expensive than a slightly higher-cost alternative that performs reliably. At the same time, premium features do not automatically produce better financial results. Measure what actually happens in your rentals.
Review your records at least annually. Identify which appliances generate the most calls, which properties experience recurring leaks or airflow problems, and which repairs failed to deliver enough additional service life. Look for patterns. Several dryer complaints in one building may point to duct design rather than three defective machines. Repeated refrigerator damage may indicate poor door clearance or inadequate tenant guidance.
Budgeting changes the emotional tone of appliance decisions. When funds are already reserved and replacement criteria are documented, you can act based on economics instead of panic. The appliance still costs money, but it no longer arrives as a complete surprise.
Reducing appliance repair costs between Cleveland tenants does not require finding a miracle machine that never breaks. It requires a repeatable system that catches problems early, supports accurate decisions, and prevents the same damage from happening again. The most effective landlords use the turnover period to inspect every appliance under realistic operating conditions. They clean before diagnosing, document before repairing, and compare total repair costs with the likely value of additional service life.
Small operational habits create much of the savings. Cleaning refrigerator ventilation areas can reduce strain. Inspecting a washer hose can prevent water damage. Leveling a machine can eliminate vibration that looks like a mechanical failure. Clearing a dryer vent can solve long drying times and protect the appliance from overheating. None of these actions feels dramatic, but together they reduce emergency calls, delayed move-ins, and unnecessary replacements.
The larger savings come from consistency across the portfolio. Standard appliance specifications simplify parts, training, installation, and purchasing. Organized repair records reveal which machines are dependable and which ones are eating the maintenance budget one invoice at a time. Clear tenant onboarding reduces misuse and encourages early reporting. Relationships with skilled local technicians improve diagnosis and shorten service timelines.
The real shift is moving from reaction to control. Instead of asking, “How cheaply can I solve this problem today?” ask, “Which decision produces the lowest reasonable cost over the next several years?” Sometimes the answer will be a ten-dollar part. Sometimes it will be a professional repair, an installation correction, or a complete replacement. When the decision is based on evidence rather than urgency, appliance spending becomes easier to forecast and defend. Better systems will not eliminate every failure, but they will keep a minor appliance problem from turning into a larger, more expensive property problem.
We repair a wide range of household appliances including refrigerators, washers, dryers, ovens, dishwashers, and more. No matter the brand or model, our experienced technicians are ready to help. We repair commercial appliances as well: commercial washers dryers, commercial refrigerators & freezer & more.
We service a wide range of household appliances, including refrigerators, dryers, washers, ranges, cooktops, dishwashers, freezers, ice makers, ovens, and double ovens. Our technicians operate across many locations in Ohio, covering major cities like Cleveland, Akron, and Parma. We also serve surrounding areas including Lakewood, Westlake, Strongsville, and Brooklyn. Our service area extends to Rocky River, Euclid, Solon, Beachwood, and Cleveland Heights, as well as counties such as Cuyahoga, Lorain, Lake, and Medina. Additional cities we cover include North-Olmsted, North Ridgeville, Valley-City, Lorain, Avon Lake, Richfield, Brecksville, Garfield Heights, Seven Hills, Brunswick, Oakwood, Mentor, and Willoughby.