Should You Repair or Replace an Appliance?
Published: August 4, 2026
You toss a normal load of towels into the dryer, select the same cycle you always use, and walk away expecting everything to be done in about an hour. Then the buzzer sounds, you open the door, and the towels still feel damp in the middle. You start another cycle, wait again, and wonder whether Cleveland’s sticky summer weather somehow followed your laundry indoors. The frustrating answer is that it probably did—but humidity is rarely the only reason a dryer suddenly takes much longer to finish the job.
A dryer removes moisture in two connected ways. First, it warms the wet clothing so water can evaporate from the fabric. Second, it moves that moisture-laden air out of the drum and sends it through the exhaust vent to the outdoors. Heat gets most of the attention, but airflow is just as important. A dryer with strong heat and weak airflow is like a bathroom with a hot shower and no exhaust fan. The room gets warmer, yet the moisture hangs around.
During humid Cleveland weather, the air entering the dryer already contains more water vapor than it does on a cool, dry day. That reduces the air’s ability to accept additional moisture from clothing. A healthy dryer can still handle the job, but it may need a little more time. If the appliance also has a clogged vent, dirty lint path, weak heating system, overloaded drum, or inaccurate moisture sensor, summer humidity exposes the problem quickly.
That is why a dryer that seemed acceptable in April may feel painfully slow in July or August. The humid weather did not necessarily create the mechanical issue. It simply removed the dryer’s margin for error. A partially restricted vent that was barely adequate in winter may become a serious obstacle when the surrounding air is warmer and wetter.
The good news is that slow drying usually leaves clues. Clothes may feel hot but damp, the laundry room may become muggy, the dryer may stop too early, or the appliance may run for hours without producing much heat. Understanding those patterns can help you decide whether the problem is seasonal, maintenance-related, or serious enough to require professional dryer repair in Cleveland.
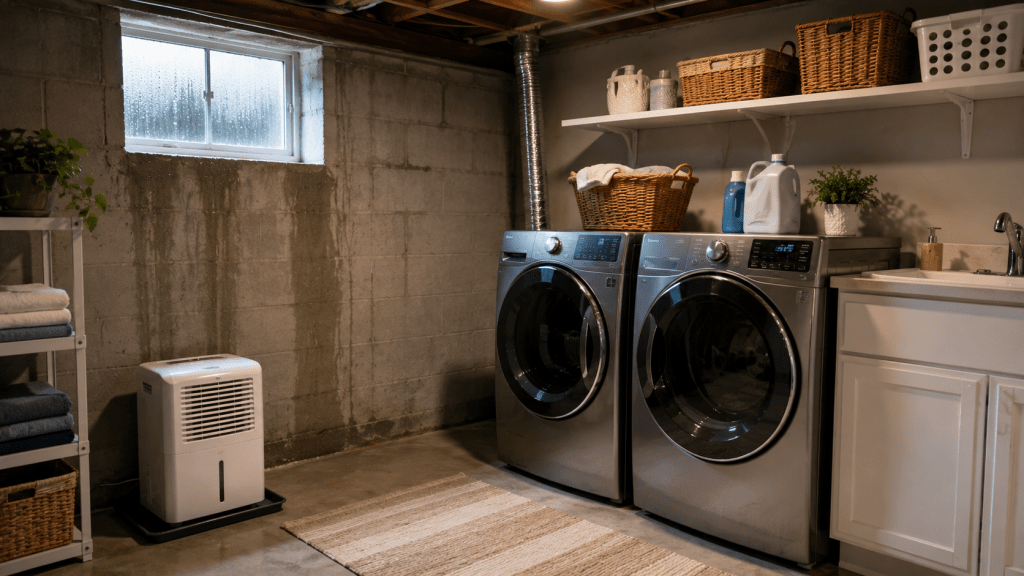
Cleveland summers are not always brutally hot, but they can be extremely humid. Air from Lake Erie, passing weather systems, summer storms, and warm temperatures can create days when everything feels slightly damp. Hardwood floors feel sticky, basement walls sweat, and towels hanging in a bathroom take forever to dry. Your dryer works against the same atmospheric conditions, especially when it sits in a basement, utility room, garage, or laundry closet without strong climate control.
To understand the effect, think of air as a sponge. Dry air is like a fresh sponge that can absorb plenty of water. Humid air is like a sponge that is already partly saturated. It can still accept more moisture, but not as quickly. The dryer has to heat the air, move it through the clothing, carry the moisture away, and replace it with a new supply of air. When the incoming air is humid, each batch removes less water from the fabric.
The appliance compensates by running longer. That extra time may be normal during the most humid days, particularly with thick towels, jeans, bedding, or large mixed loads. However, a dramatic increase—such as a load suddenly needing two or three full cycles—usually points to more than weather. Humidity may be the final weight added to a system that was already struggling.
Room temperature also matters. A dryer in a warm basement or enclosed closet cannot cool its motor, controls, and surrounding surfaces as effectively. If the room lacks makeup air, the dryer may have trouble pulling in enough fresh air to replace what it exhausts outdoors. This is especially common in tightly closed spaces where the door remains shut during operation.
The weather affects the outside end of the vent too. Damp lint can cling more stubbornly to vent walls and exterior screens. Wind, rain, insects, leaves, and debris can interfere with the exhaust hood. Even a vent flap that opens only halfway can reduce the air leaving the dryer.
Humidity is therefore not one isolated factor. It influences evaporation, ventilation, room conditions, lint behavior, and the appliance’s operating temperature. A dryer in perfect condition may slow slightly. A dryer with a hidden weakness may slow dramatically.
Drying begins when liquid water in the clothing changes into water vapor. Heat speeds up that transition, which is why warm clothing dries faster than cold clothing. Yet heat alone cannot finish the job. The vapor must move away from the fabric. If the air surrounding the clothes becomes saturated, evaporation slows even when the drum remains hot.
Inside the dryer, tumbling exposes wet fabric to moving air. The air picks up moisture and travels toward the exhaust system. Fresh air enters, heats up, and repeats the process. This continuous exchange is the heart of effective drying. When humid air enters the machine, it already carries a higher moisture load. It reaches saturation sooner and must be replaced more rapidly.
You may notice the effect most clearly with dense fabrics. A lightweight synthetic shirt contains relatively little water and allows air to move around it easily. A thick cotton towel holds far more moisture within its fibers. Jeans, comforters, bath mats, and hoodies behave similarly. During humid weather, their outer surfaces may feel warm and nearly dry while moisture remains trapped deep inside.
This is why checking only one item can be misleading. You might pull out a thin T-shirt, decide the load is finished, and later discover that the waistbands, seams, pockets, and towel centers are still damp. Mixed loads exaggerate the problem because different fabrics release water at different rates.
Humidity also affects what happens after the dryer stops. Warm clothes may feel dry immediately, then feel slightly damp several minutes later as moisture redistributes through the fabric. That is not your imagination. Heat can temporarily make the surface feel drier than the interior. Once the load cools, remaining moisture becomes more noticeable.
A properly functioning dryer manages humid air by moving a large, steady volume through the drum and vent. If airflow is weak, the moisture remains inside longer and the effect multiplies. The drum gets hot, the clothing tumbles, and the machine uses energy, but evaporation stalls because the air cannot carry enough water away.
That is why a technician evaluating slow drying should never test heat alone. The dryer can be extremely hot and still perform poorly. Temperature without airflow is only half of the drying equation.
Many Cleveland homes place the washer and dryer in the basement. It is practical, keeps laundry noise away from living areas, and makes use of space that might otherwise sit empty. Yet basements often have higher humidity than the rest of the house, especially after summer rain or during periods when warm outdoor air meets cool foundation walls.
A basement dryer draws air from that environment. If the room feels damp before the cycle begins, the machine starts with a disadvantage. The situation becomes worse when the dryer vent leaks, allowing hot, wet exhaust air to escape back into the basement. One loose connection can turn the room into a sauna and force the dryer to pull in the same moisture it is trying to remove.
Laundry closets create a different problem: limited makeup air. A dryer pushes a significant amount of air outdoors. That air must be replaced from somewhere. If the appliance operates behind a tightly closed solid door with little ventilation, it may struggle to pull in enough fresh air. The blower keeps turning, but the available airflow falls, much like trying to drink through a straw while covering the top of the cup.
Signs of poor room ventilation include a closet door that pulls inward while the dryer runs, excessive heat around the appliance, condensation on nearby walls, and much better performance when the door is left open. Louvered doors or properly sized ventilation openings may be necessary, depending on the installation and manufacturer requirements.
Basement dehumidifiers can improve the room environment, but they are not a substitute for a clear dryer vent. If the exhaust system is restricted or leaking, a dehumidifier will be fighting an enormous source of moisture. Correct the dryer airflow first, then use humidity control to improve the remaining conditions.
The physical location also affects vent length. A dryer near an exterior wall may have a short, direct exhaust route. A basement appliance in the center of the house may vent through several elbows before reaching outdoors. Every turn adds resistance and creates another place for lint to accumulate.
Cleveland humidity can make a marginal laundry setup feel much worse. The room, vent, and appliance have to be considered together. Treating only the dryer may miss the real reason moisture is not leaving efficiently.
When a dryer slows down during humid weather, homeowners often assume the weather is fully responsible. In reality, humidity usually acts like a stress test. It reveals airflow and heating problems that were already developing. A machine with a clean vent, proper power supply, healthy heater, and sensible load should still dry clothing effectively during a Cleveland summer.
The most common hidden issue is restricted airflow. Lint accumulates in the screen, internal ductwork, blower housing, transition hose, wall vent, and exterior hood. Each layer reduces the amount of damp air leaving the drum. Because the decline happens gradually, homeowners often adjust without realizing it. A cycle that once took 45 minutes becomes 60, then 75, and eventually two full cycles feels normal.
Overloading creates similar symptoms. A tightly packed drum leaves little room for clothing to tumble and separate. Heated air travels around the outside of the load instead of passing through it. Bulky items roll into damp balls, and moisture sensors may touch only the dry outer surfaces.
Heating problems may also hide until humidity rises. A weak electric element, partially failed power supply, or inconsistent gas burner may produce enough heat to get by in dry conditions. Once the incoming air carries more moisture, the reduced heat becomes obvious.
Sensor issues complicate the picture. A dryer may stop while clothes remain damp because the sensor bars are coated with residue. The opposite can happen too: a control problem may keep the appliance running long after the load is dry, wasting energy and overheating fabric.
The key is to notice the exact symptom rather than simply saying the dryer is slow. Are the clothes hot and wet, cool and wet, dry on the outside, or only damp in heavy seams? Does the room feel humid? Does the exterior vent release a strong flow of warm air? Does the heat cycle on and off normally?
Those details lead toward the cause. Hot, damp clothing usually suggests an airflow restriction. Cool, damp clothing suggests insufficient heat. Uneven drying often points to loading, tumbling, or sensor problems. Humidity may be part of the story, but the pattern reveals the rest.
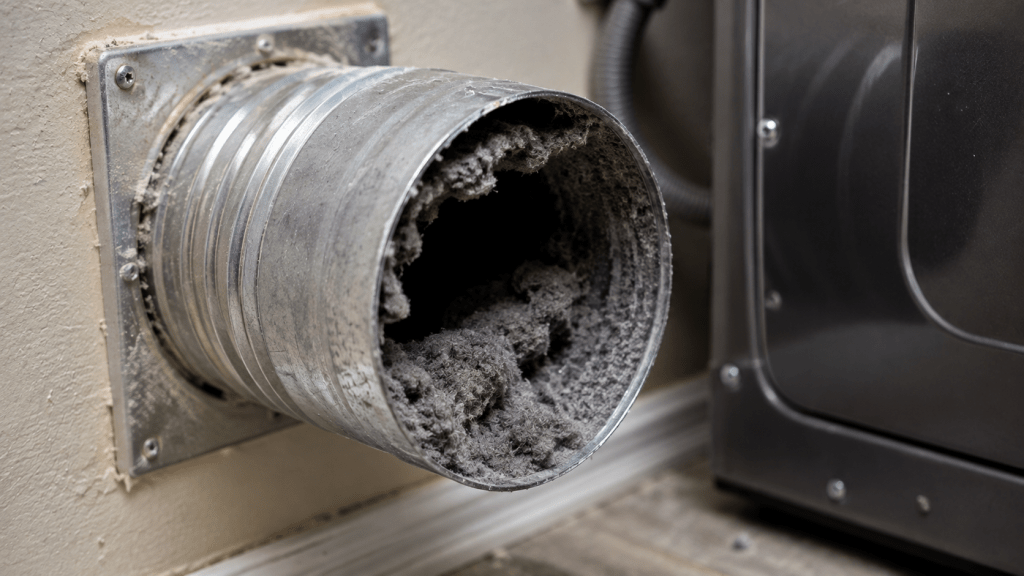
The exhaust vent is the dryer’s escape route for moisture. When that route is open, the blower pushes hot, damp air outdoors and replaces it with fresh air. When the route is restricted, moisture circulates inside the drum longer. Clothes become hot but remain damp, cycles stretch, and internal temperatures may rise beyond normal levels.
Lint is the usual cause. The lint screen catches a large amount, but it cannot catch everything. Fine fibers pass through and settle inside the dryer and vent. Flexible duct ridges create easy landing spots. Screws protruding into metal ductwork can snag lint. Long horizontal runs allow it to settle, while elbows create turbulence and buildup.
A crushed transition hose behind the dryer is another common problem. The machine may have been pushed too close to the wall, flattening the hose until only a small opening remains. From the front, everything looks neat. Behind the appliance, airflow is being strangled.
The exterior hood can also fail. Its flap may stick from lint, paint, rust, or insect activity. Some homeowners install screens over dryer vents to keep pests out, but fine screens can clog quickly with damp lint and are generally unsuitable for dryer exhaust. Snow, leaves, nests, and landscaping debris can block the outlet as well.
One of the simplest checks is to observe the exterior vent while the dryer runs. The flap should open clearly, and you should feel a strong stream of warm air. Weak airflow does not prove where the blockage is, but it confirms that the system is not moving air correctly.
Do not assume a vent is clean because the visible first few feet look clear. Buildup often hides farther inside walls, ceilings, or floor cavities. A long Cleveland basement vent may travel through several concealed spaces before reaching the exterior.
Restricted vents do more than slow drying. They increase energy use, strain heating components, and create a fire hazard because lint is highly combustible. When drying time suddenly increases, the vent system should be one of the first things inspected—not the last.
Dryer vent design has a major effect on performance. The shortest, straightest route to the outdoors is generally best. In many Cleveland homes, however, the laundry area was added long after the house was built. The dryer may sit in a basement corner or interior room far from an exterior wall. The vent has to travel upward, sideways, and around structural obstacles before it can exit.
Every elbow adds resistance. Air loses momentum as it changes direction, and lint collects where turbulence increases. A vent that looks reasonable on paper may behave like a much longer run after several turns are considered. Manufacturers usually specify a maximum effective vent length, with deductions for elbows and certain hood types.
Material matters too. Smooth rigid metal duct offers less resistance and collects less lint than flexible foil or plastic-style ducting. Flexible material may be useful as a short transition between the dryer and wall connection when approved, but long corrugated runs create thousands of small ridges where lint can settle. Plastic vent materials can also present fire concerns and should not be used for dryer exhaust.
The exterior hood must open easily. Some decorative covers look attractive but use narrow passages or multiple louvers that restrict flow. A heavy flap may barely open when the dryer blower is weak. In humid weather, damp lint can stick to these surfaces and create a thick mat.
Rain can also affect poorly designed terminations. Water entering the vent mixes with lint and creates a paste-like obstruction. Insects and birds may build nests near warm openings. If the hood sits close to the ground, grass clippings, snow, or leaves can interfere.
A professional vent inspection may include measuring airflow, checking temperature behavior, and examining the full route. Cleaning is important, but redesign may be necessary when the system is excessively long, crushed, disconnected, or built from unsuitable material.
Think of the vent as a highway. A short, straight road lets traffic move quickly. Add sharp turns, narrow lanes, construction barriers, and a blocked exit, and even a powerful engine cannot reach the destination efficiently. Your dryer blower faces the same physics.
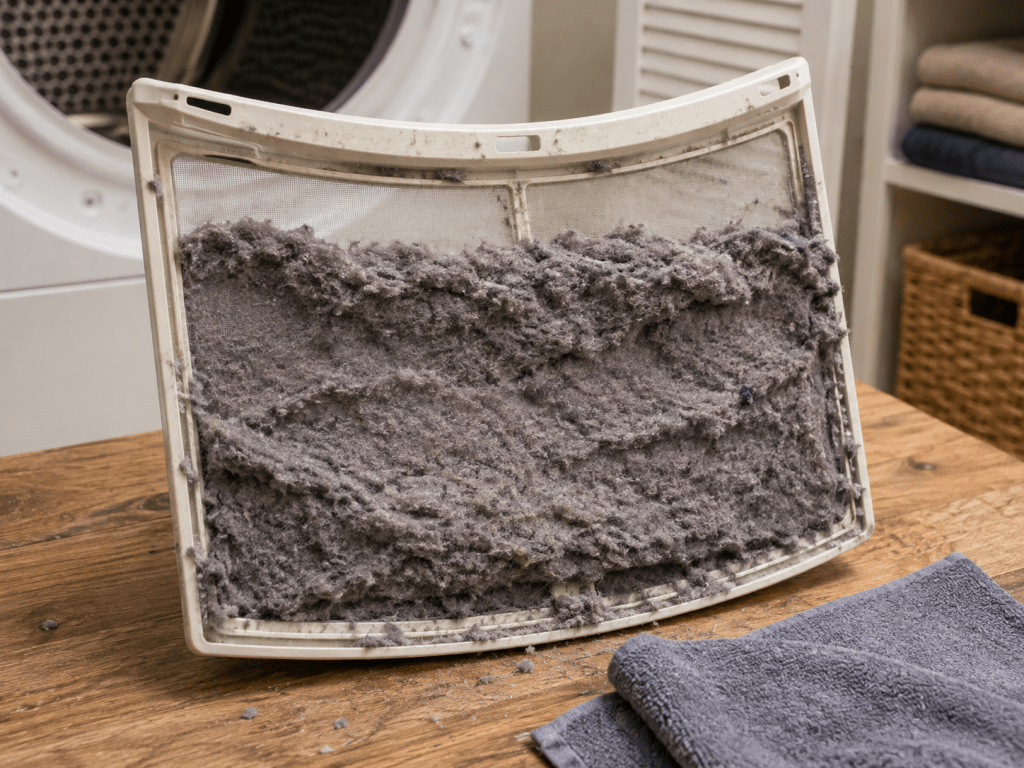
The lint screen is easy to overlook because it looks simple and usually appears clean after you peel off the visible layer. Yet fine residue from dryer sheets, fabric softener, detergent, and laundry products can coat the mesh. The screen may look clear while airflow through it has become restricted.
A quick test is to run water over the screen. If water pools on top instead of passing through freely, a film may be blocking the mesh. Wash the screen gently with warm water, mild dish soap, and a soft brush, then dry it thoroughly before reinstalling. Follow the dryer manufacturer’s instructions, especially if the filter contains unusual materials or sensors.
Clean the lint screen before or after every load. Waiting until it looks packed reduces airflow and allows more lint to bypass the filter. A damaged screen should be replaced because gaps allow fibers to enter the blower housing and vent.
Internal lint buildup is harder to see. Fibers can collect around the blower wheel, heating chamber, motor, wiring, and cabinet base. This layer acts as insulation, traps heat, and may interfere with moving parts. A blower wheel coated with lint cannot move air as efficiently. If the wheel becomes loose on the motor shaft, the dryer may sound normal while producing weak airflow.
Lint can also accumulate below the filter slot. Homeowners sometimes push long tools into the opening, but careless cleaning can damage sensors, wires, or internal ductwork. Vacuuming accessible areas is helpful, but deeper cabinet cleaning is best performed with the machine disconnected and disassembled safely by someone familiar with the design.
Humidity makes lint behavior worse because damp fibers clump together. Instead of remaining light and fluffy, they form dense mats along vent walls and screens. These mats hold even more moisture and restrict the exhaust further.
Watch for lint appearing around the dryer door, behind the machine, or near vent connections. That may indicate a leak in the exhaust path. Any leak releases heat, moisture, and lint into the laundry room instead of sending them outside.
A clean lint screen is essential, but it is only the first checkpoint. When drying remains slow after the screen is cleaned, the rest of the airflow system still deserves attention.
A dryer needs empty space inside the drum. Clothing must lift, fall, separate, and expose new surfaces to heated air. When the drum is packed tightly, items move as one heavy mass. Air travels around the outside instead of through the center, and moisture becomes trapped between layers.
Overloading is especially tempting with towels, bedding, and family laundry. Nobody wants to run three cycles when everything appears to fit into two. Yet stuffing the machine often creates the opposite result: longer drying times, more wrinkles, uneven moisture, and greater stress on the belt, rollers, motor, and support components.
Bulky items create their own problem even when the drum is not technically full. A comforter may fold around itself and form a damp center. Sheets can wrap around smaller clothing, creating a tight bundle. A bath mat may remain wet long after lightweight towels are dry.
Mixed fabrics make sensor cycles less predictable. Thin synthetic clothing dries quickly and may contact the moisture sensors while thicker cotton items remain wet. The dryer interprets the dry contact as evidence that the whole load is finished and ends the cycle early. You open the door to find dry T-shirts and damp jeans.
Separating loads by fabric weight improves both speed and consistency. Wash and dry towels together, lightweight clothing together, and heavy bedding separately. Shake out sheets and large items before placing them in the dryer so they do not begin as a compact ball.
The washer’s spin performance also matters. If the washing machine leaves clothing wetter than usual, the dryer must remove far more water. A slow-drain problem, unbalanced spin, overloaded washer, or weak suspension system can turn a normal dryer cycle into a two-hour project. Homeowners may blame the dryer even though the laundry entered it carrying twice the normal moisture.
During humid weather, these loading mistakes become more obvious because evaporation is already slower. A reasonable load gives the dryer enough room to overcome the weather. An overloaded drum removes that advantage.
A good rule is that wet clothing should tumble freely rather than slide around as one compressed bundle. The machine should move fabric through air, not simply rotate a heavy wet ball.
Heat is only one half of drying, but a dryer still needs enough of it. When the heating system weakens, humid weather exposes the problem because the incoming air requires more energy to remove moisture effectively. The dryer may still feel warm, yet “warm” is not the same as reaching the temperature range the cycle requires.
A healthy dryer cycles heat on and off. It does not remain at maximum temperature continuously. Thermostats, sensors, and controls regulate the heating system based on airflow, selected cycle, and internal temperature. If airflow becomes restricted, safety devices may shut the heat off early to prevent overheating. This can create a confusing pattern where the dryer gets hot briefly, cools down, then heats again.
Electric dryers use heating elements powered by a 240-volt electrical supply. Gas dryers use a burner, igniter, valves, and flame-sensing components. Both types depend on strong airflow. A technician cannot accurately evaluate the heating system without checking the vent and blower operation.
The load itself can provide clues. Clothes that remain cool and wet suggest little or no heat. Clothes that become extremely hot but stay damp suggest trapped moisture and restricted airflow. Clothing that dries only on timed cycles may point toward moisture-sensor trouble. A dryer that heats normally for the first few minutes and then becomes cool may have a cycling or ignition problem.
Do not keep running repeated cycles when the appliance smells hot, shuts down unexpectedly, or trips a breaker. More time does not solve a failing heating circuit. It only adds stress.
Humidity often gets blamed because the problem appears during summer, but a dryer should not need three cycles simply because the outdoor air is damp. A modest increase in drying time may be seasonal. A dramatic increase usually means heat, airflow, loading, or sensing performance has changed.
The safest diagnosis uses temperature measurements, airflow testing, electrical checks, and model-specific service information. Touching the drum or exhaust hose can provide a clue, but it cannot confirm whether the heater is operating correctly.
An electric dryer usually needs a complete 240-volt supply to produce heat. The motor and control panel may operate on only part of that supply, which creates one of the most confusing dryer symptoms: the drum turns normally, but the clothes remain cold and wet.
Homeowners often assume the heating element has failed. That is possible, but the problem may also be a tripped double-pole breaker, damaged outlet, loose terminal connection, burned power cord, or missing electrical leg from the household supply. Because the dryer still runs, the electrical issue is easy to overlook.
A double-pole dryer breaker should be reset only once by moving it fully to the off position and then back on. If it trips again, leave it off. Repeated resetting may energize a damaged circuit or appliance component. A licensed electrician should evaluate hot outlets, melted plugs, loose receptacles, or incomplete voltage.
Heating elements can fail fully or partially. Some designs use multiple coils, and one section may break while another continues heating. The dryer still becomes warm, but it lacks full capacity. During dry winter weather, the reduced heat may barely complete a normal load. During a humid Cleveland summer, towels remain damp and cycles stretch noticeably.
Thermal fuses, high-limit thermostats, cycling thermostats, thermistors, relays, and control boards also influence heating. A blown thermal fuse usually indicates that overheating occurred, often because of restricted airflow. Replacing the fuse without correcting the vent problem invites another failure.
Loose electrical connections generate heat at the wrong location. A damaged terminal block can burn the cord, melt insulation, and create a serious fire risk. Warning signs include a burning-plastic smell, discoloration around the plug, buzzing, intermittent heat, or a cord that feels unusually warm.
Homeowners should not remove energized panels or test 240-volt circuits without proper training. Electric dryers combine high voltage, sharp metal edges, hot components, and moving parts.
A professional technician should verify the incoming supply before replacing the heating element. That single step prevents unnecessary parts and helps identify whether the problem belongs inside the dryer or in the home’s electrical system.
A gas dryer uses electricity to turn the drum and control the appliance, but heat comes from a gas burner. The heating sequence typically involves an igniter, flame sensor, gas-valve coils, burner assembly, and safety controls. If any part becomes weak, the dryer may heat inconsistently.
One common pattern is strong heat at the beginning of the cycle followed by little or no heat later. Weak gas-valve coils may work when cool and fail after they warm up. The dryer continues tumbling, so the homeowner hears normal operation and assumes the humid weather is simply slowing the load. In reality, the burner may be staying off for most of the cycle.
A failing igniter can prevent the burner from lighting. The dryer may click or hum without producing heat. A dirty burner or restricted gas supply may create weak flame performance. Safety sensors may shut the system down if ignition does not occur correctly.
Airflow remains critical. A restricted vent can cause the burner to cycle off quickly because temperatures rise too fast inside the appliance. The dryer becomes hot near the cabinet, yet the clothes remain damp because the burner cannot stay on long enough to maintain effective drying.
Never continue testing a gas dryer when you smell gas. Do not operate lights, switches, phones, or anything that may create a spark in the immediate area. Leave the building and contact the gas utility or emergency service from a safe location. Gas odor is not an ordinary appliance-repair symptom.
Burner flame should be evaluated by a trained technician because access may require operating the dryer with panels removed. This exposes moving parts, hot surfaces, and gas components. Improvised adjustments to valves or fuel settings can create unsafe combustion.
The dryer must also be configured for the correct fuel type. Natural gas and propane appliances use different pressure and orifice arrangements. Incorrect conversion can cause poor heating, soot, carbon monoxide, or dangerous flame behavior.
During humid weather, a weak gas-heating system may finally become noticeable because the dryer needs more consistent heat. The weather raises the workload, but the ignition problem creates the failure.
Many modern dryers use moisture sensors to decide when clothing is dry. Instead of running for a fixed number of minutes, the appliance monitors the load and adjusts the remaining time. When the system works correctly, it saves energy and reduces damage from overdrying. When the sensors are dirty, poorly contacted, or misinterpreting a mixed load, the cycle can end too early or continue far too long.
Sensor bars are usually located near the front of the drum, often close to the lint-filter housing. Wet clothing touches the bars and completes a small electrical path. As the fabric dries, conductivity decreases, and the control board recognizes that the load is approaching the selected dryness level.
Residue from dryer sheets and fabric softener can coat the bars. The invisible film changes how they respond. The dryer may believe clothing is dry because the coating prevents good contact, or it may continue sensing moisture incorrectly. Cleaning the bars according to the manufacturer’s instructions can restore performance.
Load size matters. A very small load may not tumble against the sensors consistently. One or two damp items can travel around the drum without touching the bars often enough, causing the cycle to end early. Timed dry may work better for small loads.
Control settings also influence results. “Energy saver,” “eco,” “damp dry,” and “less dry” modes intentionally use less heat or stop before fabrics are completely dry. Homeowners may select these settings accidentally or forget that they were changed. Some dryers remember the previous cycle, so one unusual setting can affect several later loads.
Humidity can make sensor decisions more complicated because heavy fabrics dry unevenly. The outside of a towel may stop registering moisture while the center remains damp. A mixed load may contain several fully dry items that dominate sensor contact.
Before assuming the control board has failed, check the cycle, load size, fabric mix, sensor cleanliness, and airflow. The dryer’s “brain” can make only as good a decision as the information it receives.
A sensor cycle that ends too early often indicates poor contact between damp fabric and the moisture bars. Small loads, lightweight items, bulky pieces rolled into a ball, or coated sensors can all create false dry readings. The machine sees less moisture than actually remains and shuts down.
Try adding a few similar items so the load tumbles more consistently. Separate heavy towels from thin clothing. Shake out bedding before loading it. Clean the sensor bars with the method approved in the owner’s manual. Avoid sanding or scraping them because damage can change their response.
A cycle that runs too long may have the opposite problem. The sensors may remain conductive because of residue, mineral film, damp lint, or clothing repeatedly brushing them while still slightly moist. The control board continues adding time, even when most of the load is dry.
Poor airflow can also extend sensor cycles. Moisture leaves the fabric slowly, so the sensors continue detecting wetness. In that case, the sensing system is doing its job correctly. The real problem is the vent, blower, or heating system.
Some dryers estimate dryness using temperature patterns rather than direct contact alone. A thermistor monitors exhaust temperature, and the control interprets how the heat rises and falls. Restricted airflow, incorrect room conditions, or a failing temperature sensor can confuse that calculation.
Compare sensor dry with timed dry. If timed dry produces normal results but sensor cycles consistently fail, the moisture-sensing system or loading pattern deserves attention. If both modes take too long, focus first on airflow and heat.
Do not use timed dry indefinitely to hide a sensor problem. Long high-heat cycles can overdry lightweight clothing while thicker items remain damp. This wastes energy, shrinks fabric, weakens elastic, and increases lint production.
A technician can test sensor continuity, thermistor response, wiring, and control-board behavior. The exact system varies by model, so diagnosis should be based on service information rather than assumptions.
Humidity may make the symptom more visible, but sensor problems are usually manageable once the machine receives accurate information and the airflow system is restored.
You can gather useful information without opening the dryer or touching energized components. Start with the load. Was it unusually large? Did it contain towels, jeans, bedding, and lightweight shirts together? Did the washer leave the clothing wetter than normal? These questions may explain the problem without any appliance failure.
Next, clean the lint screen and inspect it for residue. Check the exterior vent while the dryer runs. The flap should open, and the airflow should feel strong. Look for lint buildup, leaves, nests, paint, or a stuck hood. Do not reach deeply into the opening while the appliance is operating.
Observe the clothing temperature. Hot, damp clothes suggest restricted airflow. Cool, damp clothes suggest weak or absent heat. Extremely hot clothing or a scorching odor indicates that the dryer should be stopped.
Check the laundry room. Is it becoming unusually warm or humid? Does the vent connection behind the dryer appear loose or crushed? Does performance improve when a closet door is open? These details point toward ventilation issues.
Review the controls. Confirm that the cycle is appropriate for the fabric. An air-fluff or low-heat setting will take much longer. Eco modes may reduce heat intentionally. Clean moisture sensors according to the manual when sensor cycles end incorrectly.
Homeowners should stop before removing service panels, testing live voltage, disconnecting gas fittings, or reaching into the blower system. Dryers contain sharp cabinet edges, powerful motors, hot surfaces, and high-voltage components. Gas models add combustion hazards.
The goal of safe troubleshooting is to identify patterns, not complete every possible repair. Useful observations can shorten a service visit and reduce guesswork. Note how long the cycle runs, whether heat remains consistent, whether the exterior airflow is strong, and which fabrics stay damp.
A slow dryer is often repairable, but continuing to operate it through repeated long cycles may increase damage. When the machine is clearly overheating, losing heat, or failing to exhaust moisture, professional diagnosis becomes the safer and more economical choice.
Begin with the lint filter. Remove all visible lint and inspect the screen under bright light. Wash away any fabric-softener film if the manufacturer permits it. Make sure the filter fits correctly and is not torn.
Check the load size. The drum should have enough empty space for clothing to lift and fall. Remove half the load and run a shorter test. If the smaller load dries normally, overloading or fabric mix may be a major factor.
Confirm that the washer is spinning effectively. Clothing should feel damp, not dripping, when it enters the dryer. If you can squeeze water from a towel after the wash cycle, the washer may be contributing to the long drying time.
Inspect the transition duct behind the dryer without moving the appliance aggressively. Look for crushing, sharp bends, tears, or loose connections. Do not use plastic ducting or long lengths of thin foil material where rigid metal is required.
Observe the exterior hood. Strong airflow and a fully opening flap are good signs. Weak flow, heavy lint, or no movement suggests restriction. Professional cleaning may be necessary when the vent travels through walls, ceilings, or a long basement route.
Try a timed cycle and compare it with sensor dry. If timed dry works but sensor dry stops too early, clean the moisture bars and reconsider load size. If both modes remain slow, airflow and heat deserve attention.
Check the breaker only when the panel area is dry and safe. An electric dryer breaker may appear on while one side has tripped internally. Reset it once by switching it fully off and back on. If it trips again, stop and call a professional.
Never use an extension cord to test a dryer. Never bypass a thermal fuse, door switch, thermostat, or safety device. Do not operate the appliance with the vent disconnected for extended periods because it releases moisture and lint into the home.
Your checks should answer three basic questions: Is the load reasonable? Is the dryer producing heat? Is damp air leaving the house strongly? Those answers provide an excellent starting point.
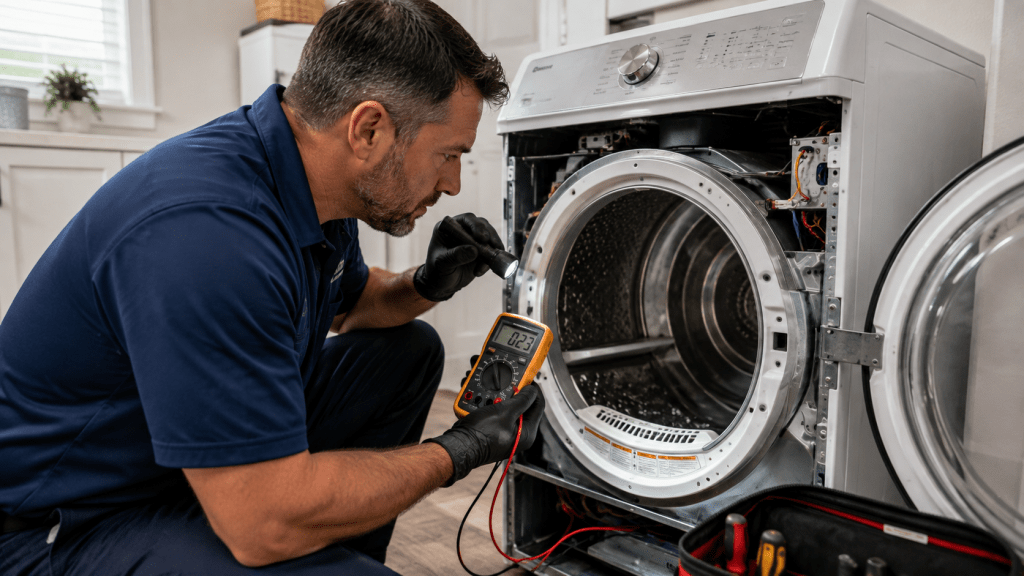
Some symptoms indicate more than ordinary humid-weather slowdown. A burning smell, smoke, sparks, or visible melting around the cord or outlet requires immediate shutdown. Disconnect power only when it is safe, and do not restart the appliance to see whether the smell returns.
Repeated breaker trips also require professional attention. The cause may be a shorted heating element, damaged wiring, failing motor, loose terminal, or household electrical issue. A breaker is a safety device, not a reset button for ongoing troubleshooting.
A gas odor demands an emergency response. Leave the area, avoid creating sparks, and contact the gas utility or emergency services from a safe location. Do not attempt to tighten connections or relight the burner yourself.
Grinding, scraping, thumping, or squealing can indicate worn drum rollers, a damaged belt, failing idler pulley, loose blower wheel, or foreign object. Continuing to run the dryer may turn a relatively simple repair into motor or drum damage.
Extremely high cabinet temperature, clothing that is too hot to handle, or a dryer that shuts down and restarts after cooling suggests overheating. Restricted airflow is a common cause, but failed thermostats, sensors, or controls may also be involved.
A dryer that tumbles without heat after a breaker reset needs electrical or heating-system diagnosis. A gas dryer that heats only at the beginning of the cycle may have weak valve coils or ignition components. A sensor cycle that behaves incorrectly after cleaning and proper loading may need control-system testing.
Visible lint leaking from cabinet seams or collecting heavily behind the dryer suggests an internal or vent disconnection. This increases fire risk and fills the room with moisture.
Professional service should include more than replacing the first part associated with the symptom. A qualified technician should check airflow, vent condition, temperature cycling, electrical supply, heating components, sensors, and error history.
Humidity may explain a small seasonal difference. It does not explain smoke, repeated electrical failure, gas odor, severe overheating, or a dryer that suddenly needs three cycles. Those are repair signals, not weather quirks.
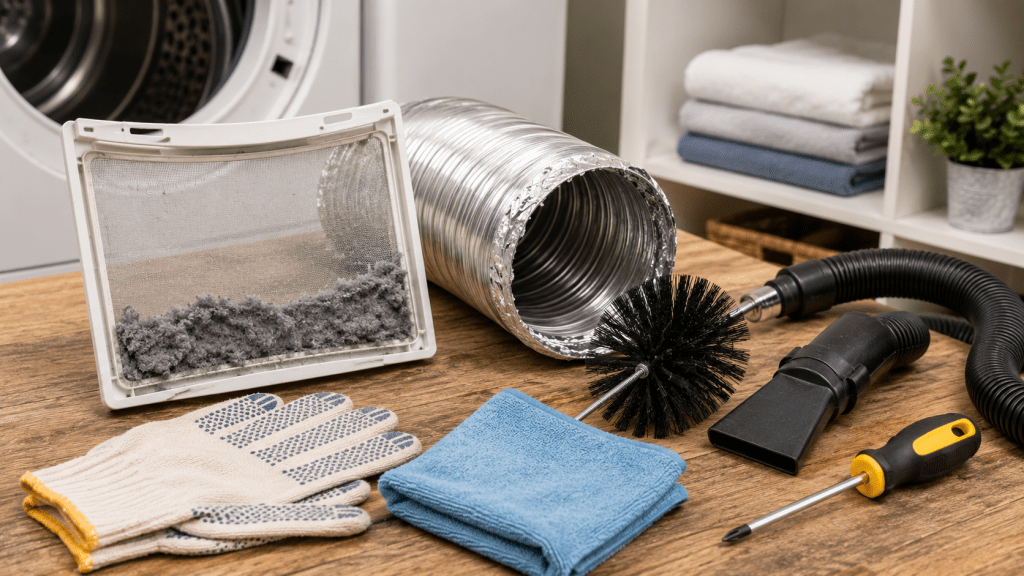
Prevention begins with airflow. Clean the lint screen after every load, inspect the exterior hood regularly, and have the full vent cleaned at an interval appropriate for its length and usage. Homes with long basement vent runs, large families, pets, or frequent towel loads may need service more often than homes with short, direct vents.
Use smooth metal ducting and keep the transition behind the dryer as short and straight as possible. Avoid pushing the appliance tightly against the wall. A recessed connection box or low-profile metal fitting may help in tight spaces.
Control the laundry-room environment. Run a dehumidifier in a damp basement when needed, but keep it far enough from the dryer that it does not restrict access or airflow. Repair foundation leaks, plumbing drips, and disconnected vent joints. Leave a ventilated closet door open during operation if the installation requires more makeup air.
Sort loads by weight. Dry towels with towels, lightweight clothing with similar items, and bulky bedding separately. Shake out sheets and comforters before loading them. Do not fill the drum so tightly that items cannot tumble.
Maintain the washer too. Clean its drain system, avoid overloading, and investigate clothing that leaves the washer unusually wet. A strong final spin can remove a large amount of water before the dryer ever starts.
Use the right cycle. High heat is not always faster, especially when it damages fabric or causes sensors to react unpredictably. Follow garment labels and choose a dryness level appropriate for the load. Clean moisture-sensor bars periodically.
Pay attention to changes. A gradual increase from 50 to 65 minutes may be the first sign of vent restriction. Do not wait until every load requires two cycles. Early cleaning costs less than replacing an overheated heater, motor, control board, or thermal fuse.
Schedule professional inspection when the vent is inaccessible, unusually long, or routed through concealed spaces. A technician can identify crushed ducting, weak blower performance, and temperature problems that ordinary surface cleaning misses.
Cleveland humidity is unavoidable, but its effect can be managed. A clean, properly heated, well-ventilated dryer should still perform reliably through the muggiest part of summer.
Your dryer may take a little longer during Cleveland’s humid weather because damp air absorbs moisture less efficiently than dry air. That seasonal difference is real, especially in basements and enclosed laundry rooms. Yet humidity alone should not turn one normal cycle into two or three full cycles.
When drying time increases dramatically, airflow is the first place to look. A clogged lint screen, restricted wall vent, crushed transition duct, blocked exterior hood, or long vent route can trap moisture inside the drum. Clothes become hot without becoming dry, the laundry room grows muggy, and the dryer runs far longer than it should.
Heat problems create a different pattern. Electric dryers may tumble without full heating power when part of the 240-volt supply is missing. Heating elements can weaken, thermal devices can fail, and loose electrical connections can overheat. Gas dryers may ignite normally at first and lose heat later because of weak valve coils or ignition components.
Loading and sensing matter too. An overloaded drum cannot move air through clothing effectively. Mixed fabrics dry at different rates, while coated moisture sensors may stop the cycle too early or keep it running too long.
Cleveland homeowners can safely clean the lint screen, inspect the exterior vent, reduce load size, compare timed and sensor cycles, verify washer spin performance, and check for crushed ducting. Those observations reveal a great deal without opening the appliance.
Stop using the dryer when you notice a burning smell, gas odor, repeated breaker trips, extreme overheating, smoke, sparks, or grinding noises. These symptoms require professional attention.
Think of humid weather as a performance test. A healthy dryer may slow slightly, but it should still move heat and moisture efficiently. When the machine suddenly struggles, the weather is often exposing a hidden maintenance or repair issue. Fix that underlying problem, and your laundry should stop feeling like an all-day summer project.
We repair a wide range of household appliances including refrigerators, washers, dryers, ovens, dishwashers, and more. No matter the brand or model, our experienced technicians are ready to help. We repair commercial appliances as well: commercial washers dryers, commercial refrigerators & freezer & more.
We service a wide range of household appliances, including refrigerators, dryers, washers, ranges, cooktops, dishwashers, freezers, ice makers, ovens, and double ovens. Our technicians operate across many locations in Ohio, covering major cities like Cleveland, Akron, and Parma. We also serve surrounding areas including Lakewood, Westlake, Strongsville, and Brooklyn. Our service area extends to Rocky River, Euclid, Solon, Beachwood, and Cleveland Heights, as well as counties such as Cuyahoga, Lorain, Lake, and Medina. Additional cities we cover include North-Olmsted, North Ridgeville, Valley-City, Lorain, Avon Lake, Richfield, Brecksville, Garfield Heights, Seven Hills, Brunswick, Oakwood, Mentor, and Willoughby.