Freezer Ice Buildup: Causes and What to Check
Published: September 23, 2026
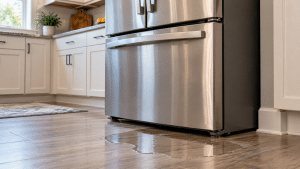
Finding a puddle under your refrigerator can be unsettling. You walk into the kitchen, notice water spreading across the floor, and your first thought may be that something expensive has failed. Other times, the leak is less dramatic. You pull out a crisper drawer and discover water sitting underneath it, droplets running down the back wall, or moisture collecting on shelves. The good news is that a leaking refrigerator does not automatically mean the appliance needs a major repair. Quite a few refrigerator water leaks come from simple drainage, condensation, installation, or water-line problems that you can investigate yourself.
The first thing I look at when diagnosing a refrigerator leak is not a specific component. I look at where the water appears. That location tells you a lot. Water under the crisper drawers often points toward a defrost drainage problem. Water coming from the rear of the appliance may have something to do with the drain pan or water supply connection. A puddle near the front can come from condensation, a door that is not sealing correctly, or water that has traveled forward from somewhere else. If your refrigerator has a water dispenser or automatic ice maker, the list of possible sources becomes slightly longer.
Refrigerators naturally produce some water during normal operation. Moisture enters whenever you open the door, and frost may form on very cold internal surfaces. In many designs, a defrost cycle periodically melts that frost. The resulting water is supposed to travel through a small drain and eventually evaporate from a pan underneath the appliance. When everything works correctly, you never see that water. When the path becomes blocked, frozen, cracked, or disconnected, the water suddenly ends up somewhere you definitely can see it.
Instead of wiping up the puddle and hoping it disappears, pay attention to the pattern. Is the leak constant or occasional? Does it happen after the ice maker fills? Is there water only inside the fresh-food compartment? Does it appear after humid weather? Those clues can turn a frustrating mystery into a surprisingly manageable DIY refrigerator repair.
Before moving the refrigerator, removing panels, or trying to clear any drains, take a close look at where the water is actually collecting. Leak location is one of the most useful diagnostic clues because refrigerator water tends to follow predictable paths. You do not need specialized equipment for this first step. A flashlight, a few dry towels, and careful observation can tell you more than randomly replacing parts ever will.
If you find water underneath the crisper drawers, start thinking about the defrost drainage system. During normal defrosting, melted frost should move through a drain opening rather than entering the food compartment. When that drain becomes blocked or freezes shut, water can overflow into the bottom of the refrigerator. Depending on the design, it may collect under drawers for several days before you notice it.
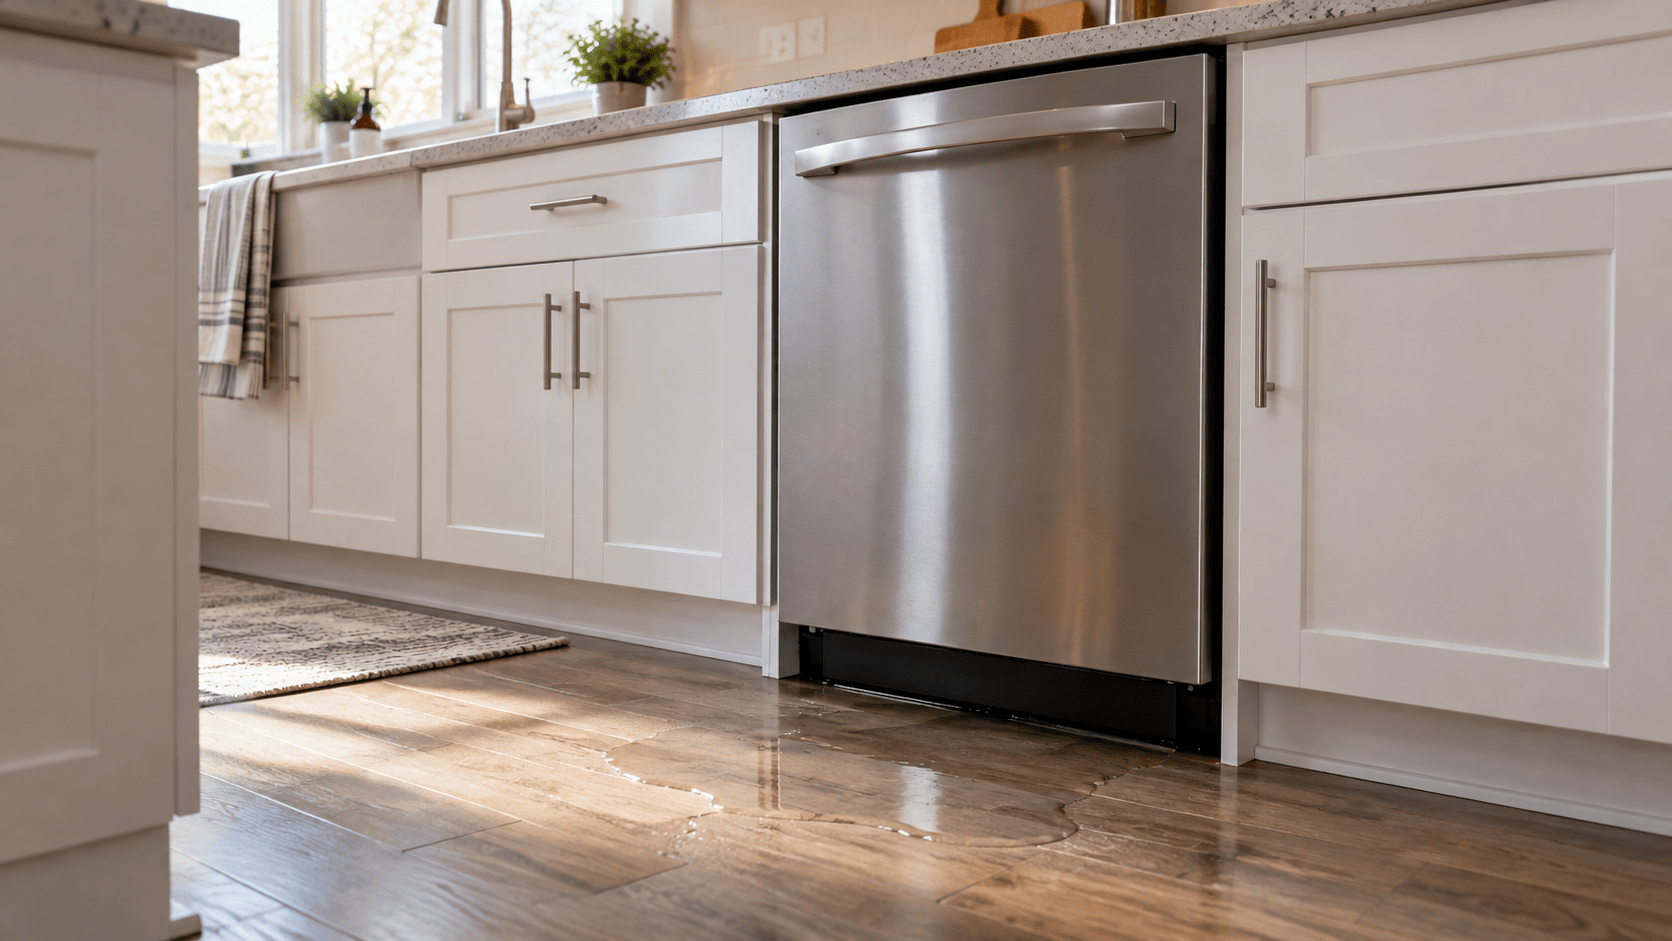
A puddle underneath the refrigerator is different. Water on the floor may come from the drain pan, a water supply connection, an ice maker line, or a leak that started inside and eventually found its way through an opening. Do not assume the puddle is directly below the failed component. Water travels. It can run along tubing, cabinet surfaces, or the floor before becoming visible.
Water near the front door often points toward condensation, a poor door seal, or something spilled inside. Look for moisture along the door gasket and lower edge of the compartment. If the gasket is not sealing tightly, humid room air can continuously enter and condense on cold surfaces.
Water appearing behind the refrigerator deserves extra attention if the unit is connected to a household water supply. A loose fitting or tiny crack in a flexible line can create a slow leak that stays hidden until enough water reaches the floor.
Dry the entire area thoroughly before continuing. Once everything is dry, watch where moisture first returns. That first wet spot is usually much more useful than the large puddle you discovered later. In refrigerator troubleshooting, following the water backward toward its source is often the fastest path to an answer.
A clogged defrost drain is one of the first things to investigate when water repeatedly appears inside the refrigerator, especially below the lowest drawers. The drainage system is simple in concept. Frost that develops during normal cooling is periodically melted. That water travels toward a drain opening, passes through a tube, and ends up in an evaporation pan near the bottom of the appliance. You normally never interact with this process because it happens automatically in the background.
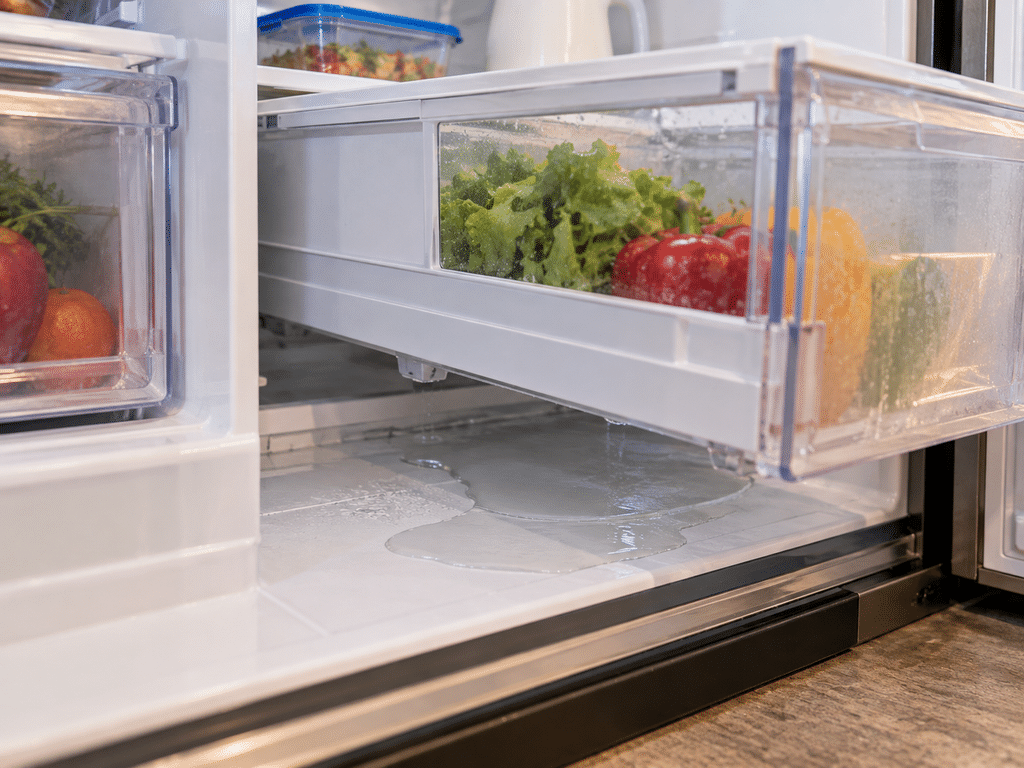
Problems begin when food particles, dust, sticky residue, or other debris blocks the drain opening. Water from the next defrost cycle cannot move through the tube normally, so it looks for another path. In many refrigerators, that means flowing forward or downward into the fresh-food compartment. Eventually you discover a shallow pool beneath the crisper drawers and wonder where it came from.
You can often recognize this situation because the water keeps returning to the same location even after you wipe everything dry. There may also be a small amount of ice near the drain area. If the water is clean and there is no obvious leaking food container nearby, the drain becomes an even stronger suspect.
Before investigating the drain, disconnect electrical power to the refrigerator. You are dealing with moisture around an electrical appliance, so unplugging it is a basic safety step. Remove food and drawers as necessary to reach the accessible drain area. Refrigerator layouts vary, so do not force panels or components that are clearly not designed for easy removal.
If the drain opening is visible, inspect it for obvious debris. Warm water can often help loosen residue. A small amount introduced carefully into the accessible drain may be enough to flush a minor obstruction. Avoid pouring boiling water onto cold plastic or glass because sudden temperature changes can damage materials.
Do not shove knives, screwdrivers, stiff wire, or other sharp objects deep into the drain tube. You can puncture or damage tubing that is difficult to replace. The goal is to restore normal water flow, not force your way through an unknown obstruction.
Once the drain is clear, dry the compartment and monitor it. If water no longer returns under the drawers, you have probably found the problem.
A drain can be perfectly clean and still fail because it is frozen shut. This produces symptoms that look almost identical to a clogged drain, which is why homeowners sometimes clean the opening repeatedly without actually solving the problem.
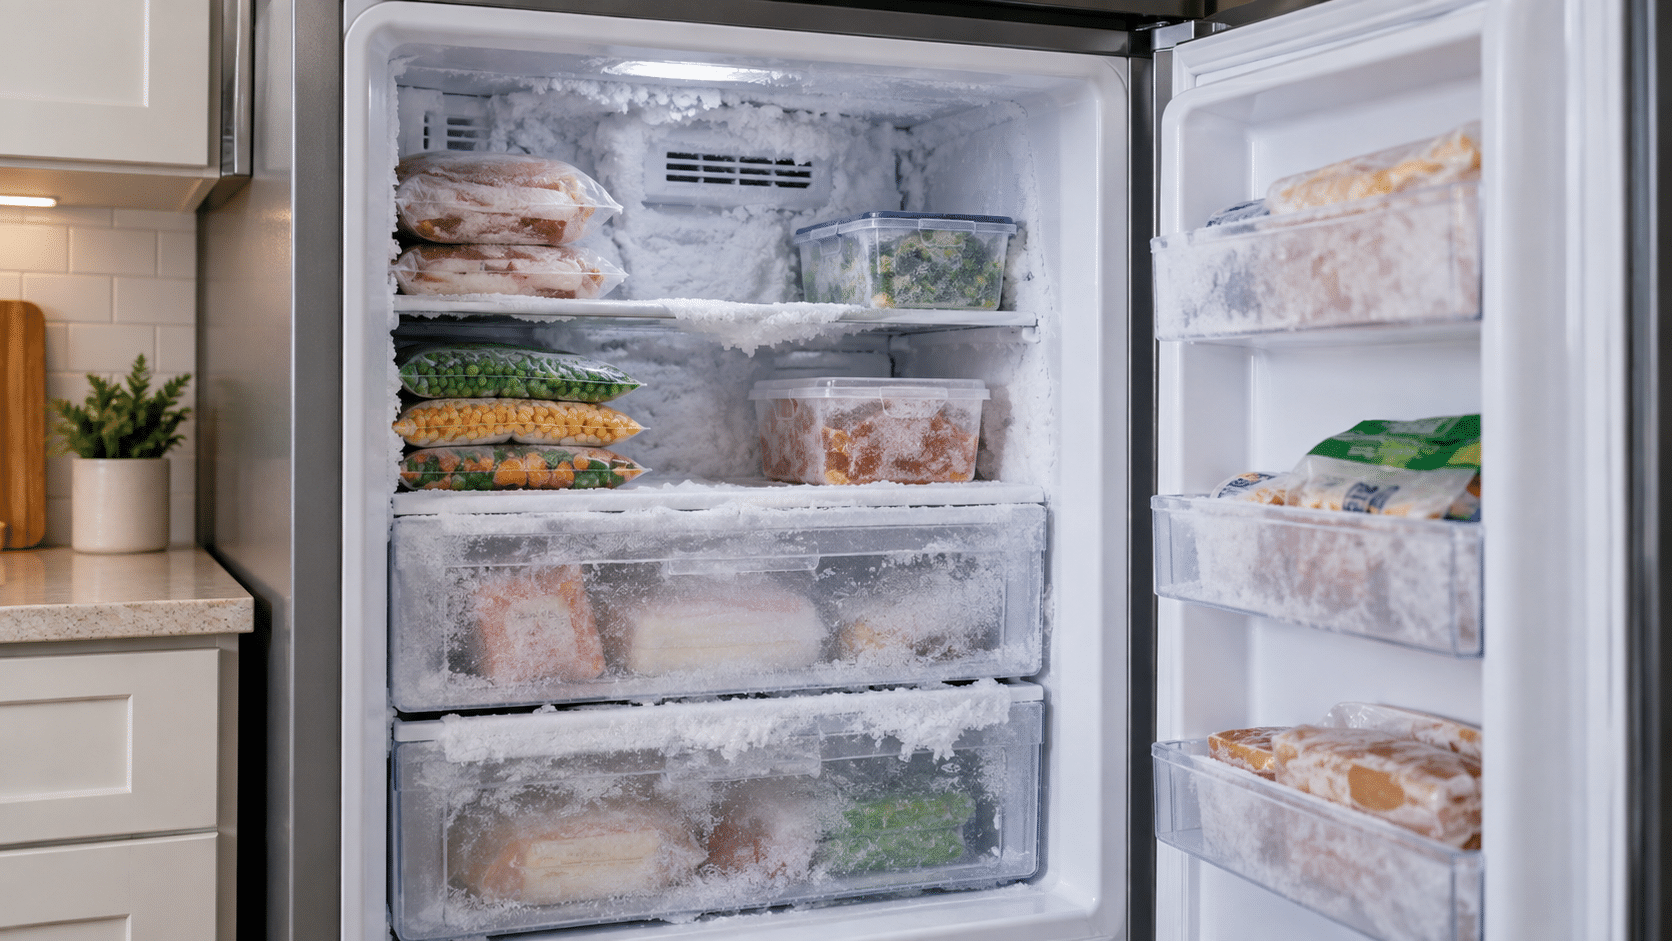
Here is what happens. During a defrost cycle, frost melts and turns into liquid water. That water is supposed to reach the drain before freezing again. If ice forms inside or immediately around the drain opening, the next batch of defrost water cannot escape. It pools in the cold compartment, freezes, and gradually creates an even larger blockage. Eventually additional water spills into the refrigerator section, where it may collect beneath drawers.
One clue is a visible sheet of ice on the bottom surface or near the rear interior wall. You might remove the water one day and find it back shortly afterward. In more advanced cases, you can see ice covering the area where the drain should be located.
A full thaw is often the safest way to deal with a frozen drain. Unplug the refrigerator and protect the floor with towels. Move temperature-sensitive food to another cold location. Allow the ice to soften naturally. You can use warm water in a controlled way to accelerate melting around accessible areas, but avoid excessive heat.
Never attack frozen drainage areas with a knife. Refrigerator liners can be thinner than they look, and refrigerant tubing or other critical components may be located behind surfaces you cannot see. One slip can turn a drainage inconvenience into a serious appliance failure.
After the ice has completely melted, check whether water can move through the drain normally. If the drain freezes again soon afterward, pay attention. Repeated freezing may mean there is another issue influencing temperature or drainage. Ice could be forming because water is not flowing quickly enough, the refrigerator is positioned incorrectly, or an internal component is creating abnormal conditions around the drain.
A one-time frozen drain can sometimes be resolved with a complete defrost. A defrost drain that repeatedly freezes deserves a deeper investigation instead of endless thawing.
If water appears beneath the refrigerator but the interior remains completely dry, the drain pan becomes worth checking. The drain pan collects water produced during automatic defrosting. Heat from normal refrigerator operation and airflow around the lower section of the appliance usually cause that water to evaporate before the pan ever fills completely.
Because the pan is designed to contain water, seeing a small amount inside it is not necessarily a problem. What is abnormal is water escaping from the pan or accumulating faster than it can evaporate.
A pan may develop a crack after years of vibration, movement, or accidental impact. Even a hairline crack can allow water to drip slowly onto the floor. Since defrost water reaches the pan only periodically, the leak may appear intermittent rather than constant. You might wipe the floor in the morning, see nothing for hours, and then discover another small puddle later.
Another possibility is that the pan has shifted out of position. If the drain tube is supposed to empty directly into the pan but no longer lines up correctly, water may fall beside it instead. This can happen after the refrigerator has been moved for cleaning or flooring work.
Disconnect power before reaching underneath or behind the appliance. Depending on the refrigerator’s construction, you may be able to inspect the drain pan without extensive disassembly. Look for visible cracks, warping, standing water, or evidence that water has been running outside its intended path.
Dust and debris can also reduce evaporation. The area around the lower refrigerator compartment often collects dust, pet hair, and kitchen debris. Keeping accessible ventilation areas clean helps the refrigerator release heat efficiently and can support normal evaporation.
Do not assume that a full drain pan automatically needs replacement. A suddenly overflowing pan can indicate an unusually large amount of water is reaching it. In that case, the pan may simply be revealing another problem.
Think of the pan as the final stop in the refrigerator’s drainage route. When water reaches the floor beneath the appliance, checking that final stop makes practical sense.
If your refrigerator receives water from a household plumbing connection, the supply line is another major place to inspect. This line typically feeds an ice maker, water dispenser, or both. Unlike defrost water, which appears only periodically, a pressurized supply line can continue leaking as long as the household water valve remains open.
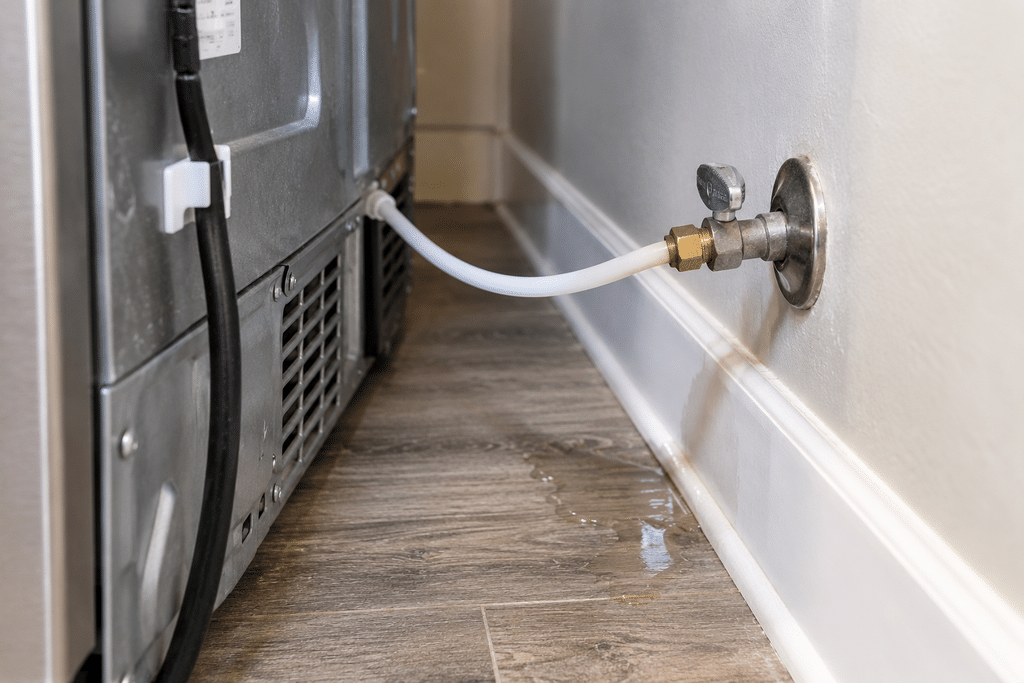
Small supply-line leaks are tricky because they can remain hidden behind the refrigerator. A loose fitting may release only a few drops at a time. Those drops collect on the floor, spread underneath the appliance, and eventually become visible along one edge. By that point, the source may be several feet from the visible puddle.
Carefully pull the refrigerator away from the wall if it can be moved safely. Do not yank it forward because the water line and power cord need enough slack. Look at the floor behind the appliance and inspect the accessible tubing. Moisture around a connection, mineral deposits, discoloration, or a wet section of tubing can indicate a leak.
Flexible water lines can develop cracks, kinks, or worn areas. Connections can loosen slightly after the refrigerator has been moved. If you recently cleaned behind the appliance, changed flooring, or relocated the refrigerator, consider whether the line may have been pulled or bent.
Before tightening or disconnecting anything, turn off the refrigerator’s water supply valve. You do not want to loosen a pressurized fitting and suddenly send water across the kitchen.
After drying the line and connections, restore the water supply and watch carefully. A dry paper towel can be useful for detecting a tiny leak around a fitting because even a small amount of water becomes immediately visible.
Never ignore a slow supply-line leak simply because the refrigerator still works normally. Water can damage flooring, cabinets, drywall, and subflooring long before the appliance develops any obvious cooling problem.
When the refrigerator is connected to plumbing, separating appliance drainage leaks from pressurized water-line leaks is one of the most important early diagnostic steps.
If your refrigerator has an automatic ice maker, watch whether the leak seems connected to the ice-making cycle. The ice maker periodically requests water through a valve. That water travels through tubing and a fill tube before entering the ice mold. If something goes wrong along that route, water can end up inside the freezer, behind the appliance, or eventually on the kitchen floor.
One common issue is a fill tube that has shifted out of position. Instead of directing water neatly into the ice maker, it may spray or drip beside it. The misplaced water then freezes into unusual ice formations or runs to another part of the compartment before freezing.
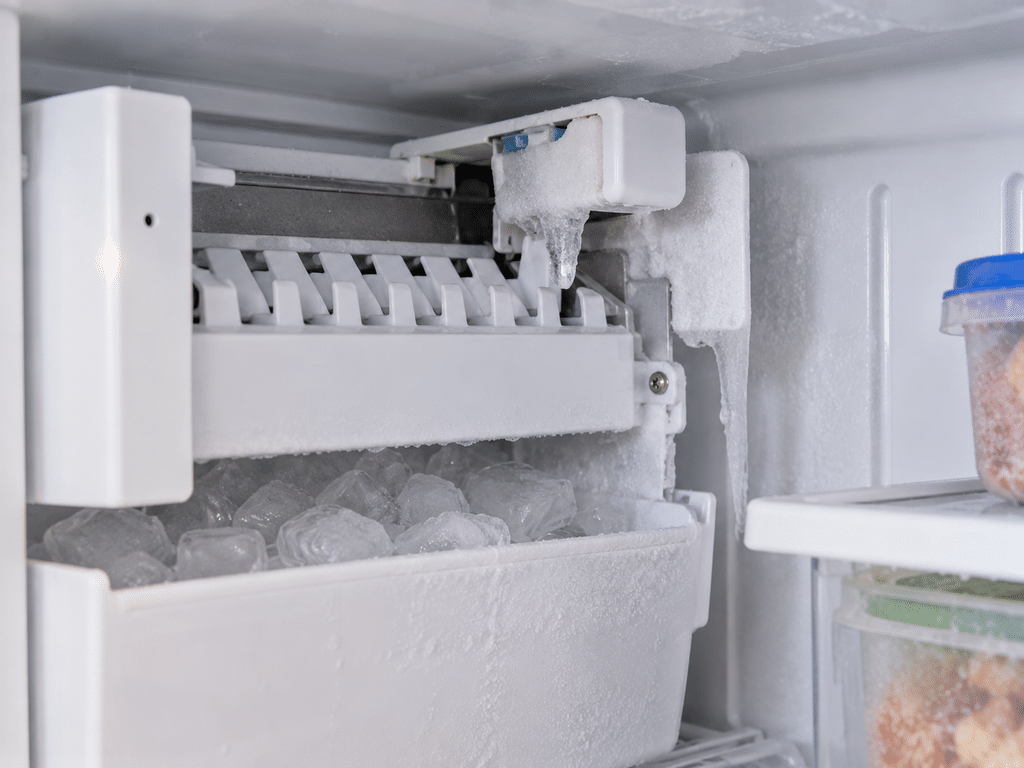
Look for ice buildup around the ice maker, frozen droplets on nearby walls, or a block of ice where there normally should not be one. These clues suggest that water is escaping during the filling process.
A partially frozen fill tube can create similar trouble. If the opening is restricted with ice, incoming water may spray sideways rather than flowing smoothly. You may notice small icicles or frozen splashes around the inlet area.
The water inlet valve is another possibility. If it does not close fully, a small amount of water can continue entering after the normal fill cycle has finished. This may overfill the ice maker or cause a slow drip.
A useful DIY test is observation. Dry the area around the ice maker and watch what happens during a fill cycle if the components are safely visible. You are looking for water appearing at the exact moment the ice maker fills.
Do not put your hands near moving ice-maker components while the refrigerator is operating. If you need to touch, reposition, or inspect something closely, disconnect electrical power first.
If the leak disappears after you temporarily shut off the refrigerator’s water supply, you have also learned something important: the source probably belongs to the pressurized water system rather than the defrost drainage system.
Water leaks linked to ice production often leave frozen evidence behind. Pay attention to strange ice formations, not just liquid water. If the leak keeps returning and the source appears to be within the ice-making system, professional ice maker repair may be appropriate rather than repeatedly thawing or adjusting components.
A refrigerator water dispenser involves several connections that can potentially leak. Water may travel from the household supply line through internal tubing, a valve, and sometimes a filter assembly before reaching the dispenser. A problem at any connection can produce moisture that is difficult to trace.
Some dispenser leaks are obvious. Water drips directly from the dispenser after use, runs down the front of the door, and collects on the floor. In that situation, first determine whether you are seeing a few normal leftover drops or continuous leaking. A drop or two immediately after dispensing is very different from a steady drip that continues for minutes.
Air trapped inside the water system can sometimes cause temporary dripping after plumbing work or filter service. Repeated or persistent leakage, however, deserves investigation.
Other dispenser-system leaks stay hidden inside the refrigerator. A tubing connection may release water only while the dispenser is being used. Because the system is under pressure during operation, even a small crack can send water into an interior compartment.
Dry all accessible areas first. Then dispense water while watching for new moisture. If water appears only during dispenser use, you have narrowed the problem dramatically.
Inspect visible tubing for kinks, abrasion, cracks, or loose connections. Do not pull hard on plastic lines because age can make some tubing brittle.
If your refrigerator includes a replaceable water filter, make sure it is properly seated. An incorrectly installed filter or damaged seal can allow water to escape around the housing. You do not need a specific brand to understand the principle: any pressurized connection needs a complete seal.
If you discover water near electrical wiring, controls, or inaccessible internal components, stop using the dispenser and shut off its water supply until the source is addressed.
A refrigerator can cool perfectly while its dispenser system leaks. That is why cooling performance alone cannot tell you whether the appliance is operating safely.
Not every refrigerator leak comes from plumbing or drainage. Sometimes the “leak” is actually condensation caused by warm, humid air entering through a door that does not seal correctly.
Cold refrigerator air contains relatively little moisture. Warm room air can carry much more. When humid air enters the compartment and touches cold surfaces, its moisture condenses into droplets. Those droplets may run down walls, collect beneath drawers, or eventually reach the floor.
Start by inspecting the door gasket, the flexible seal around the perimeter of the door. Food residue, crumbs, sticky spills, or grease can prevent the gasket from sitting flat against the refrigerator cabinet. Clean it with mild soapy water and a soft cloth.
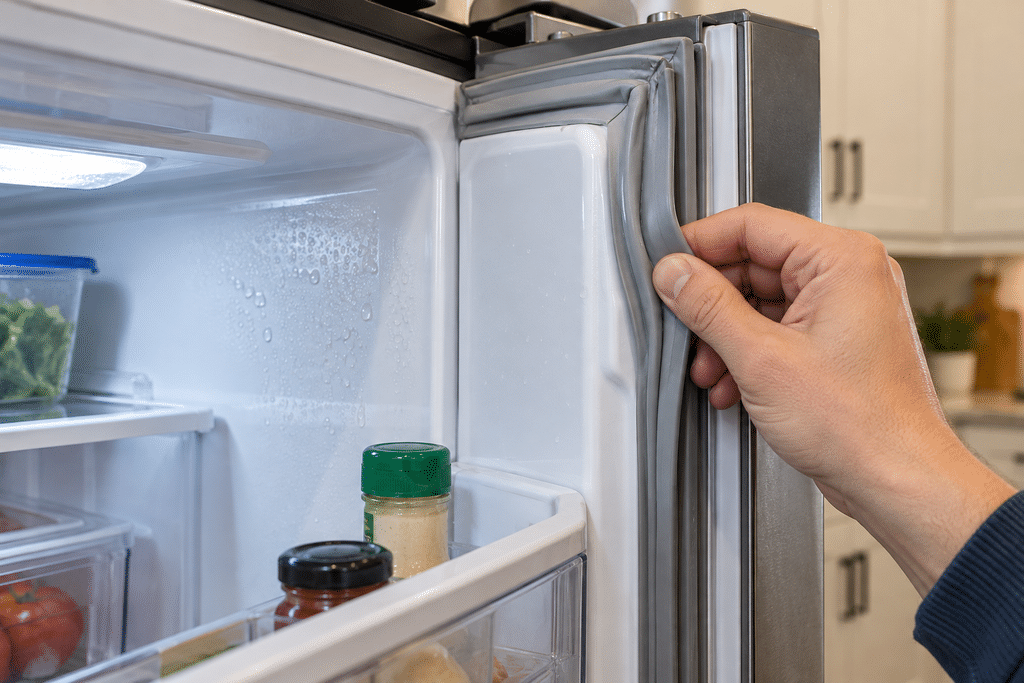
Next, look for physical damage. Torn sections, hardened rubber, warped corners, or flattened areas can create small gaps. Those gaps may look insignificant, but they allow a continuous exchange of air.
Try the paper test. Close the refrigerator door on a piece of paper and gently pull it out. You should feel resistance. Repeat this around several areas of the door. A section where the paper slides out very easily may not be sealing well.
Food placement matters too. A large container, drawer, shelf item, or bottle can stop the door from closing completely. You might think you shut the refrigerator when there is actually a narrow opening along one edge.
Frequent door opening can also create temporary condensation during humid weather. That does not necessarily mean anything is broken. The difference is persistence. Normal moisture should decrease when the door remains closed and temperatures stabilize.
If you regularly find beads of water on walls, shelves, or containers, check the seal before assuming a drain has failed.
Controlling refrigerator moisture begins with keeping household air outside. A tight refrigerator door seal protects food temperature, reduces energy use, and helps prevent condensation from becoming a puddle.
Refrigerator temperature and airflow play a larger role in water problems than many people realize. The appliance needs to maintain a stable cold environment without creating excessively cold zones or unusually warm areas. When airflow becomes restricted, moisture may condense or freeze where it should not.
A refrigerator compartment is generally intended to keep food safely cold without freezing most fresh foods. If the setting is excessively cold, water near certain surfaces or drainage areas may freeze. That can contribute to blocked drains or sheets of ice that later melt.
If the refrigerator is too warm, condensation may become more noticeable because surfaces and air temperatures are no longer balanced correctly. Food safety can also become an issue, so use an appliance thermometer if you suspect the displayed or selected setting does not reflect the actual temperature.
Blocked vents are another common DIY problem. Refrigerator air needs to circulate. When containers and food packages are packed directly against ventilation openings, cold air cannot move normally. One area may become unusually cold while another becomes warm and damp.
Look for vent openings along the rear wall or sides of the compartment. Move food away from them and leave enough room for airflow.
Overloading shelves can also redirect condensation. Large packages pushed against the rear wall may collect droplets and guide water downward. You open the refrigerator, see water beneath a drawer, and assume there is a plumbing leak when condensation has actually been traveling along containers.
The same idea applies to freezer-to-refrigerator airflow in appliances that share a cooling system. Ice buildup in one area can restrict circulation and cause temperature instability somewhere else.
After rearranging food, give the refrigerator time to stabilize. Do not constantly adjust the temperature setting every few hours. Frequent changes make it difficult to identify the real problem.
Think of airflow like circulation in a house. Blocking every vent and then turning the thermostat up or down does not solve the distribution problem. Maintaining clear refrigerator air vents and stable temperature often prevents moisture problems before they become visible leaks.
A refrigerator does not need to look dramatically crooked for leveling to matter. Small installation differences can affect door closing and, in some designs, the way defrost water reaches its drain.
Start with the doors. A refrigerator that leans forward too much may allow doors to drift open instead of staying firmly closed. Even a tiny opening can introduce humid air all day, leading to condensation and water accumulation.
You can observe the door rather than guessing. Open it slightly and see how it behaves. Depending on the appliance’s design and installation instructions, the refrigerator may require a slight backward orientation so the doors naturally move toward the closed position.
Use a basic level across accessible cabinet surfaces if you suspect the refrigerator has shifted. Floors are not always perfectly flat, particularly in older kitchens. Adjustable leveling feet or rollers are commonly used to compensate.
Do not make dramatic adjustments without considering the refrigerator’s installation requirements. The goal is stable, correct positioning, not simply making every surface mathematically horizontal.
Improper leveling can sometimes influence drainage as well. Water is supposed to move toward specific channels and openings. If the appliance is significantly tilted, water may pool somewhere unexpected before reaching the drain.
This is especially worth checking after the refrigerator has been moved. New flooring, remodeling, cleaning, or simply rolling the appliance forward can change how it sits. A leveling foot may have been adjusted accidentally or one wheel may be resting on a different floor surface.
Also make sure the cabinet does not rock. Movement can place stress on water connections and may contribute to fittings loosening over time.
Leveling is easy to overlook because it seems unrelated to leaking. Yet it influences two major factors at once: door sealing and water drainage.
When troubleshooting water that appears after relocation or kitchen work, checking how the refrigerator sits can save you from chasing more complicated explanations.
Before assuming the refrigerator has a mechanical problem, check the food. This sounds almost too simple, but spilled or leaking containers are responsible for plenty of “refrigerator leaks.”
A cracked water bottle, poorly closed milk container, produce bag filled with condensation, leaking food-storage container, or melting ice package can release enough liquid to create a surprisingly large puddle under a drawer.
Liquids rarely stay exactly where they spill. Refrigerator shelves often have edges, seams, channels, and openings that allow water to move. A container leaking on an upper shelf may create water near the bottom hours later.
Remove suspicious containers and inspect shelf surfaces. Look for dried residue, sticky areas, stains, or a trail running down an interior wall. Clear water can still come from food, especially washed produce.
Produce itself contains plenty of moisture. Fresh vegetables placed into a sealed drawer while still very wet can produce condensation. This usually creates a smaller moisture issue rather than a dramatic floor leak, but it can confuse the diagnosis.
One easy troubleshooting method is to clean and dry the refrigerator completely. Put all liquids in secure containers and return the food. Then monitor the appliance. If the water does not return, you may have solved the mystery without touching a single component.
Pay attention to ice stored in open containers too. If refrigerator temperature rises temporarily, ice can melt and create water that later looks like an appliance leak.
This simple check is especially useful when the puddle appears only once. Mechanical leaks tend to repeat. A damaged water line or blocked drain usually keeps producing symptoms until the condition changes.
An isolated puddle with no recurring moisture deserves a careful search for an ordinary spill before any repair work begins.
Good troubleshooting means considering simple explanations before complicated ones. Sometimes what looks like a refrigerator failure is just Tuesday night’s soup slowly escaping from a container.
Weather can influence refrigerator moisture more than many homeowners expect. During humid summer conditions, every time you open the refrigerator door you allow moisture-rich air inside. When that air cools, water can condense on cold surfaces.
You may suddenly notice droplets on containers, shelves, interior walls, or around the door even though the refrigerator worked normally for months. The appliance may not have changed at all. The environment around it changed.
High humidity becomes much more noticeable when combined with a small door-seal problem. A gasket leak that caused almost no visible moisture during dry winter weather can create substantial condensation during a humid summer.
Start by confirming that the doors close tightly. Then reduce unnecessary door-open time. You do not need to race through the kitchen, but standing in front of an open refrigerator while deciding what to eat allows a surprising amount of humid air inside.
Do not store uncovered warm foods either. They release additional moisture into the compartment. Allow food to cool safely and use covered containers.
Moisture on the outside surface of the refrigerator can also be related to humidity. Condensation forms when humid air contacts a surface cold enough to reach the dew point. Depending on the exact location, however, exterior moisture can also indicate a sealing or insulation issue, so persistent heavy condensation should not automatically be dismissed as weather.
Check the room itself. Is the refrigerator near a dishwasher producing steam? Is it in a basement or garage with very high humidity? Is ventilation poor?
A dehumidified, climate-controlled kitchen places far less moisture load on a refrigerator than a hot, damp utility room.
Humidity alone usually does not cause a major stream of water, but it can produce enough condensation to mimic a small leak. When troubleshooting, consider both the appliance and the environment around it. Water inside a refrigerator always comes from somewhere, and sometimes that “somewhere” is simply the air in your kitchen.
The easiest way to troubleshoot a refrigerator leak is to work from the visible water backward toward its source. Do not start by ordering parts. Most successful DIY diagnosis comes from narrowing the possibilities one clue at a time.
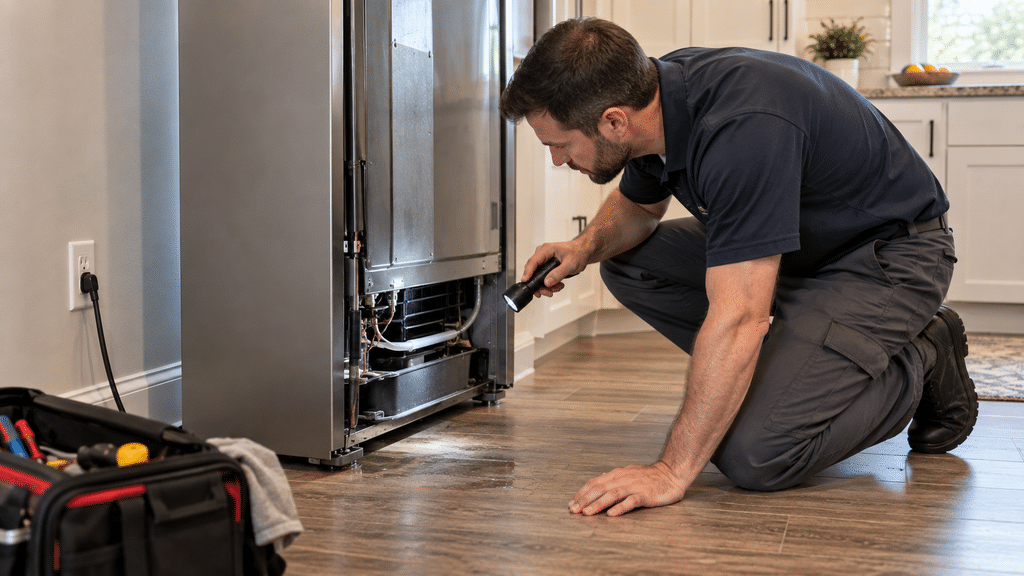
First, disconnect power when you need to inspect areas near electrical components. If the refrigerator is connected to a household water supply and you suspect a pressurized leak, shut off that water supply before disconnecting any tubing.
Dry the refrigerator interior and the floor completely. This step is more important than it sounds. Existing water can travel and make the leak source look completely different from where it actually started.
Next, identify whether the water returns inside or outside. Water below the crisper drawers points you toward the defrost drain. Water behind the refrigerator makes the water line and drain pan more relevant. Moisture near the door suggests condensation or sealing issues.
Inspect the door gasket and make sure no food container prevents closing. Check airflow vents and verify that the compartment temperature is reasonable.
If the refrigerator has an ice maker or dispenser, look for a connection between water use and leaking. Dry everything, operate the dispenser, and inspect again. Watch for unusual ice around the ice maker.
Inspect accessible supply-line connections behind the refrigerator. Use a dry paper towel around fittings to detect very small amounts of moisture.
If water appears under the drawers, inspect the accessible defrost drainage area. Clear visible debris gently and thaw ice rather than breaking it with sharp tools.
Look at the drain pan if accessible. Check for cracks, displacement, or evidence that the drain tube is missing the pan.
Then monitor the refrigerator instead of changing several things at once. If you clean the drain, adjust the temperature, move the refrigerator, replace tubing, and rearrange food simultaneously, you will never know what actually solved the problem.
Make one logical correction and observe the result.
Stop DIY work if you encounter damaged electrical wiring, sealed refrigeration components, inaccessible internal plumbing, or a water leak you cannot safely isolate. If the source cannot be safely identified or the leak keeps returning, professional refrigerator repair can help identify the underlying problem without unsafe disassembly.
The goal of DIY troubleshooting is not to prove that you can dismantle the entire refrigerator. It is to identify the leak safely and solve the straightforward causes yourself.
A refrigerator leaking water inside or onto the floor can come from several different places, but the problem becomes much easier to understand when you focus on the path the water is taking. Start with location. Water under the crisper drawers tells a different story from water behind the refrigerator, just as condensation near the door points toward different causes than ice around an automatic ice maker.
One of the most common causes of water inside a refrigerator is a blocked or frozen defrost drain. When melted frost cannot reach the drain pan normally, it often ends up underneath the lower drawers. A complete thaw or careful clearing of accessible debris may solve the problem.
Water on the floor can come from the drain pan, household water supply tubing, dispenser system, or ice-maker connections. These leaks deserve quick attention because even a slow drip can damage kitchen flooring or nearby cabinets.
Do not overlook basic causes. Check the door gasket, make sure food is not preventing the door from closing, leave air vents unobstructed, and look for leaking food containers. High humidity can also create enough condensation to look like a minor appliance leak.
A good troubleshooting routine is simple: dry everything, observe where water returns first, and follow that path backward. Change one thing at a time so you know what actually fixed the problem.
Safety matters as much as diagnosis. Disconnect electrical power before working around internal components. Shut off the household water supply before disconnecting pressurized tubing. Never use sharp tools to chip ice around hidden refrigerator components.
Many common refrigerator leaks are completely approachable as DIY problems when the source is an accessible drain, loose connection, door-sealing issue, or simple condensation problem. When the leak involves inaccessible electrical parts, internal valves, damaged wiring, or sealed refrigeration components, the job has moved beyond basic homeowner troubleshooting and may require professional refrigerator repair.
The refrigerator is usually giving you clues long before you find the exact source. Follow those clues carefully, and a mysterious kitchen puddle often becomes a straightforward problem you can understand.
We repair a wide range of household appliances including refrigerators, washers, dryers, ovens, dishwashers, and more. No matter the brand or model, our experienced technicians are ready to help. We repair commercial appliances as well: commercial washers dryers, commercial refrigerators & freezer & more.
We service a wide range of household appliances, including refrigerators, dryers, washers, ranges, cooktops, dishwashers, freezers, ice makers, ovens, and double ovens.
Our technicians operate across many locations in Ohio, covering major cities like Cleveland, Akron, and Parma. We also serve surrounding areas including Lakewood, Westlake, Strongsville, and Brooklyn.
Our service area extends to Rocky River, Euclid, Solon, Beachwood, and Cleveland Heights, as well as counties such as Cuyahoga, Lorain, Lake, and Medina.
Additional cities we cover include North Olmsted, North Ridgeville, Valley City, Lorain, Avon Lake, Richfield, Brecksville, Garfield Heights, Seven Hills, Brunswick, Oakwood, Mentor, and Willoughby.